<?xml version="1.0" encoding="utf-8"?>
<feed xmlns="http://www.w3.org/2005/Atom">
    <id>https://blog.azad.asia</id>
    <title>Azad&apos;s Space</title>
    <updated>2025-07-16T01:51:57.865Z</updated>
    <generator>https://github.com/jpmonette/feed</generator>
    <link rel="alternate" href="https://blog.azad.asia"/>
    <link rel="self" href="https://blog.azad.asia/atom.xml"/>
    <subtitle>Azad的个人博客</subtitle>
    <logo>https://blog.azad.asia/images/avatar.png</logo>
    <icon>https://blog.azad.asia/favicon.ico</icon>
    <rights>All rights reserved 2025, Azad&apos;s Space</rights>
    <entry>
        <title type="html"><![CDATA[Cloudflare Workers 反向代理 Google AI API ]]></title>
        <id>https://blog.azad.asia/040/</id>
        <link href="https://blog.azad.asia/040/">
        </link>
        <updated>2025-06-08T07:03:12.000Z</updated>
        <content type="html"><![CDATA[<h1 id="步骤一登录-cloudflare">步骤一：登录 Cloudflare</h1>
<ol>
<li>打开<a href="https://dash.cloudflare.com/" target="_blank">Cloudflare</a></li>
<li>登录你的账号</li>
</ol>
<h1 id="步骤二创建-worker">步骤二：创建 Worker</h1>
<ol>
<li>在左侧菜单找到并点击 <strong>&quot;Workers and Pages&quot;</strong></li>
<li>点击 <strong>&quot;Create application&quot;</strong> 按钮</li>
<li>选择 <strong>&quot;Create Worker&quot;</strong></li>
<li>给你的 Worker 起个名字，比如：<code>google-ai-proxy</code></li>
<li>点击 <strong>&quot;Deploy&quot;</strong> 按钮</li>
</ol>
<h1 id="步骤三编辑-worker-代码">步骤三：编辑 Worker 代码</h1>
<ol>
<li>部署完成后，点击 <strong>&quot;Edit code&quot;</strong> 按钮</li>
<li>删除默认的所有代码</li>
<li>复制粘贴 <strong>google-ai-proxy.js</strong> 里面所有的代码。<p class="note">进入 <a href="https://github.com/Azad-sl/google-ai-proxy" target="_blank">Azad-sl/google-ai-proxy</a> 复制</p>
</li>
<li>点击右上角的 <strong>&quot;Save and deploy&quot;</strong> 按钮</li>
</ol>
<h1 id="步骤四获取-worker-地址">步骤四：获取 Worker 地址</h1>
<p>部署成功后，你会看到类似这样的地址：</p>
<pre><code>https://google-ai-proxy.你的用户名.workers.dev
</code></pre>
<p><strong>这个地址就是你的代理地址</strong></p>
<h1 id="步骤五添加自定义域名">步骤五：添加自定义域名</h1>
<ol>
<li>在 Worker 详情页面，点击 <strong>&quot;Settings&quot;</strong> 标签</li>
<li>向下滚动找到 <strong>&quot;Triggers&quot;</strong> 部分</li>
<li>在 <strong>&quot;Custom Domains&quot;</strong> 区域，点击 <strong>&quot;Add Custom Domain&quot;</strong></li>
<li>输入你的自定义域名：<code>xxx.example.com</code></li>
<li>点击 <strong>&quot;Add Custom Domain&quot;</strong></li>
<li>等待生效</li>
</ol>
<ul>
<li>DNS 记录会自动创建</li>
<li>SSL 证书会自动申请</li>
<li>通常 2-5 分钟内生效</li>
</ul>
<h1 id="步骤六测试-api-访问">步骤六：测试 API 访问</h1>
<p><strong>1. 浏览器测试</strong> 在浏览器访问：</p>
<pre><code class="language-bash">https://xxx.example.com/v1/models
</code></pre>
<p>如果返回：</p>
<pre><code class="language-bash">{
    &quot;error&quot;: {
        &quot;code&quot;: 403,
        &quot;message&quot;: &quot;Method doesn't allow unregistered callers (callers without established identity). Please use API Key or other form of API consumer identity to call this API.&quot;,
        &quot;status&quot;: &quot;PERMISSION_DENIED&quot;
    }
}
</code></pre>
<p>说明成功了。是时候去 <a href="https://makersuite.google.com/app/apikey">Google AI Studio</a>申请你的API key了。</p>
<p><strong>2. curl 命令测试</strong></p>
<pre><code class="language-bash">curl -I &quot;https://xxx.example.com/v1/models&quot;
</code></pre>
<p><strong>3. 完整 API 测试</strong></p>
<pre><code class="language-bash">curl &quot;https://xxx.example.com/v1/models?key=你的API密钥&quot;
</code></pre>
<h1 id="在代码中使用">在代码中使用</h1>
<p><strong>Python 示例：</strong></p>
<pre><code class="language-python">import requests

# 使用自定义域名
base_url = &quot;https://xxx.example.com&quot;
api_key = &quot;你的API密钥&quot;

url = f&quot;{base_url}/v1/models/gemini-pro:generateContent?key={api_key}&quot;

data = {
    &quot;contents&quot;: [{
        &quot;parts&quot;: [{&quot;text&quot;: &quot;你好，请介绍一下自己&quot;}]
    }]
}

headers = {
    &quot;Content-Type&quot;: &quot;application/json&quot;
}

response = requests.post(url, json=data, headers=headers)
print(response.json())
</code></pre>
<p><strong>JavaScript 示例：</strong></p>
<pre><code class="language-javascript">const baseUrl = &quot;https://xxx.example.com&quot;;
const apiKey = &quot;你的API密钥&quot;;

const url = `${baseUrl}/v1/models/gemini-pro:generateContent?key=${apiKey}`;

const data = {
    contents: [{
        parts: [{ text: &quot;你好，请介绍一下自己&quot; }]
    }]
};

fetch(url, {
    method: 'POST',
    headers: {
        'Content-Type': 'application/json',
    },
    body: JSON.stringify(data)
})
.then(response =&gt; response.json())
.then(data =&gt; console.log(data))
.catch(error =&gt; console.error('Error:', error));
</code></pre>
<hr>
<br>
]]></content>
    </entry>
    <entry>
        <title type="html"><![CDATA[AI问禅——「却惑几菩提」使用指南]]></title>
        <id>https://blog.azad.asia/qhgpt/</id>
        <link href="https://blog.azad.asia/qhgpt/">
        </link>
        <updated>2025-06-08T04:08:11.000Z</updated>
        <content type="html"><![CDATA[<h1 id="一-关于-却惑几菩提">一、关于 却惑几菩提</h1>
<p><b><a href="https://qhgpt.aihub.ren/" target="_blank"><big>却惑几菩提</big> </a>是一方以 AI 技术为舟、佛家文化为海的禅意对话空间</b>。平台深植禅宗公案、佛教经典的智慧土壤，借由 AI 的语言妙力，为您开启一场「问心寻道」的交互式修行 —— 无论您想探寻佛法真义、化解生活迷思，还是暂栖于禅意的宁静之光中，或能在字句往还间，偶遇内心的回响。</p>
<p>平台以「自性求佛」为宗，以问答为禅机，愿作您反观内省的镜鉴。对话内容随刷新而空，如露亦如电，守护您的心灵私域；亦恳请以包容之心观照平台内容，其旨在种文化交流之因，而非作佛法权威之论。</p>
<figure data-type="image" tabindex="1"><img src="https://img.aihub.ren/i/2025/06/04/nazgy1.png" alt="长按或扫码访问" loading="lazy"></figure>
<h1 id="二-如何使用">二、如何使用</h1>
<h2 id="1-api-配置">1. API 配置</h2>
<p>本平台支持 <strong>硅基流动（SiliconFlow）</strong> 与 <strong>302.AI</strong> 服务驱动，<strong>平台内置API，可直接开启对话</strong>。</p>
<p class="note">点击<a href="https://docs.siliconflow.cn/cn/usercases/use-siliconcloud-in-qhgpt" target="_blank">却惑几菩提-SiliconFlow</a>查看硅基流动使用文档。
<br> 仍然建议设置你自己的硅基流动 或 302.AI API 密钥，将会优先调用。<br>可避免公用API因同时使用人数过多导致的回复速率问题。</p>
<h3 id="获取硅基流动-api">获取硅基流动 API</h3>
<ol>
<li>打开 「<strong><a href="https://cloud.siliconflow.cn/i/ddWlmzS3" target="_blank">硅基流动 官网</a></strong> 」并注册账号（如果注册过，直接登录即可）。<strong>点击上方链接注册，可获得 14元 额度</strong>。</li>
</ol>
<figure data-type="image" tabindex="2"><img src="https://img.aihub.ren/i/2025/06/04/jw98gl.png" alt="扫描二维码登录/注册" loading="lazy"></figure>
<ol start="2">
<li>完成注册后，打开页面左侧 「 <a href="https://cloud.siliconflow.cn/account/ak" target="_blank">API密钥</a> 」，点击「 <strong>新建API 密钥</strong>」，点击密钥进行复制保存，以备后续使用。</li>
</ol>
<figure data-type="image" tabindex="3"><img src="https://img.aihub.ren/i/2025/05/24/10tmta1.png" alt="" loading="lazy"></figure>
<h3 id="获取302ai-api">获取302.AI API</h3>
<ol>
<li>
<p>打开 「 <a href="https://share.302.ai/jkMrF9" target="_blank"><strong>302.AI 官网</strong></a> 」并注册账号（如果注册过，直接登录即可）。<strong>点击上方链接注册，可领取 1美刀 额度</strong>。</p>
</li>
<li>
<p>完成注册后，进入<a href="https://dash.302.ai/apis/list" target="_blank">「管理后台」</a>，点击页面左侧「 <a href="https://dash.302.ai/apis/list" target="_blank">API Keys</a>」，可以自行「添加AΡΙ KEY」，也可以直接使用下方默认的API Key，拉到页面下方点击复制即可。</p>
<figure data-type="image" tabindex="4"><img src="https://img.aihub.ren/i/2025/07/08/z2duyg.png" alt="image_1192" loading="lazy"></figure>
</li>
</ol>
<h2 id="2-填入api-key">2. 填入API Key</h2>
<ol>
<li>
<p>请先阅读页面下方的 <strong>【告示】</strong></p>
<figure data-type="image" tabindex="5"><img src="https://img.aihub.ren/i/2025/06/03/gr9rv6.png" alt="" loading="lazy"></figure>
</li>
<li>
<p>在页面对话输入框，右下角位置找到 <strong>【拈花】</strong>，点击会展开 <strong>【API Key】<strong>以及</strong>【自定义角色】<strong>输入框。请在</strong>【API Key】<strong>右侧的输入框中</strong>粘贴您刚刚在 硅基流动 或 302.AI 页面复制保存的 API key</strong>。</p>
<figure data-type="image" tabindex="6"><img src="https://img.aihub.ren/i/2025/06/03/gse9b1.png" alt="" loading="lazy"></figure>
</li>
<li>
<p>点击人物头像，在头像下方的输入框中，输入您想要询问的问题、探讨的话题或内心的困惑。例如，您可以问 “如何理解‘诸行无常’？” 或 “生活中遇到烦恼该如何化解？”回车或点击右侧【 <strong>卍</strong> 】按钮开启对话。输入框左侧为【<strong>清空对话</strong>】，右侧为 【<strong>发送对话</strong>】、【<strong>导出对话记录</strong>】，点击【<strong>录经</strong>】复制当前回复，点击 <strong>【轮转】</strong> 将重新生成回复。等待回复过程中点击【<strong>唵</strong>】 将终止回复。</p>
<figure data-type="image" tabindex="7"><img src="https://img.aihub.ren/i/2025/06/03/gz2mwk.png" alt="" loading="lazy"></figure>
</li>
<li>
<p>当前版本仍处于持续迭代升级阶段，平台将陆续融入更多禅意新功能与趣味小彩蛋，静待您前来探索发现。</p>
</li>
<li>
<p><strong>对话中请勿透露姓名、住址等个人信息。AI所言或有经义偏差、名相错用、语境不合之处，权作参考。争议处还请存包容心，欲求真解，还须参访明师。</strong>（合十）</p>
</li>
</ol>
<hr>
<br>]]></content>
    </entry>
    <entry>
        <title type="html"><![CDATA[两个小网站，与AI一起参禅悟道]]></title>
        <id>https://blog.azad.asia/039/</id>
        <link href="https://blog.azad.asia/039/">
        </link>
        <updated>2025-04-03T10:40:18.000Z</updated>
        <content type="html"><![CDATA[<p>在这个Deepseek能写诗、Stable Diffusion会画禅意的时代，用最前沿的AI技术去触碰最古老的智慧，似乎是一件矛盾而浪漫的事。今天和大家分享我打磨了许久的两个“小而美”的作品——<strong>「却惑几菩提」<strong>与</strong>「问道」</strong>。作为汉语言文学出身的半桶水开发者，这也是我的一次小小尝试：让沉淀千年的东方智慧，以更轻盈的方式走进现代生活。</p>
<hr>
<h2 id="❶-一眼心静的ui设计"><strong>❶ 一眼心静的UI设计</strong></h2>
<h3 id="佛系空间a-hrefhttpsqhgptaihubren-target_blank却惑几菩提a"><strong>▍ 佛系空间：<a href="https://qhgpt.aihub.ren/" target="_blank">却惑几菩提</a></strong></h3>
<ul>
<li><strong>视觉</strong>：素净的米白底色，散华与上香的视觉动态，昼夜模式</li>
<li><strong>对话角色</strong>：<br>
🌸 <strong>佛陀</strong>、   <strong>禅师</strong>、   <strong>小沙弥</strong>   ……</li>
<li><strong>其他</strong>：<br>
① 背景音乐是日本乐队SENS的《妙音鸟》<br>
② 使用方式：查看下方”告示“说明。点击输入框下方「拈花」填入API Key，即可使用对话<br>
<img src="https://github.com/Azad-sl/picx-images-hosting/raw/master/image_1140.wiqgonprs.webp" alt="" loading="lazy"></li>
</ul>
<h3 id="道系天地a-hrefhttpswendaoaihubren-target_blank问道a"><strong>▍ 道系天地：<a href="https://wendao.aihub.ren/" target="_blank">问道</a></strong></h3>
<ul>
<li><strong>视觉</strong>：素雅的水墨山水，鼠标点击会漾开墨痕，点击右上角太极切换昼夜模式</li>
<li><strong>对话角色</strong>：<br>
☯ <strong>老子</strong>、   <strong>庄子</strong>、   <strong>文子</strong>、 <strong>列子</strong></li>
<li><strong>实用功能</strong>：
<ul>
<li>道家智慧签、经典查阅、打坐计时、背景音乐等<br>
<img src="https://github.com/Azad-sl/picx-images-hosting/raw/master/image_1141.6m42s9j2a4.webp" alt="image_1141" loading="lazy"></li>
</ul>
</li>
</ul>
<hr>
<h2 id="❷-技术背后"><strong>❷ 技术背后</strong></h2>
<ul>
<li><strong>更懂中文的AI内核</strong>：默认对接硅基流动API，采用深度求索（DeepSeek）v3最新模型，内置公益API密钥（推荐自备密钥更流畅）
<ul>
<li>如果你没有硅基流动API，可以点击 <a href="https://cloud.siliconflow.cn/i/5bqYGuO9" target="_blank">我的硅基流动邀请链接</a> 进入注册，新用户注册，你和我都会获得2000万token，获得的免费额度将用于支持网站的公益API。</li>
</ul>
</li>
</ul>
<hr>
<h2 id="立即体验"><strong>立即体验</strong></h2>
<ul>
<li><a href="https://qhgpt.aihub.ren/" target="_blank">却惑几菩提</a></li>
<li><a href="https://wendao.aihub.ren/" target="_blank">问道</a></li>
</ul>
<p>你也可以扫描下方二维码访问👇：<br>
<img src="https://github.com/Azad-sl/picx-images-hosting/raw/master/20250402_110923_ci.b92twy0ql.webp" alt="" loading="lazy"></p>
<hr>
<h2 id="后话">后话：</h2>
<p>技术不应只是冰冷的代码，更可以是承载温度的容器。AI爆发这两年，见惯了&quot;替代焦虑&quot;，我却更相信庄子说的“大知闲闲，小知间间”。看着现在AI都在卷职场、搞生产力，总觉得少了点什么。想起大学时在农史所实习，每天戴着白手套翻脆黄的书页，总会感叹这些让古人彻夜长谈的智慧，难道只能活在博物馆射灯下？后来偶然用ChatGPT分析《道德经》，发现它居然能指出第五章&quot;天地不仁&quot;和儒家仁爱的思想碰撞——那一刻突然开窍，AI不正是我们这代人的&quot;活字印刷术&quot;？所谓“青青翠竹，尽是法身”，何妨借大语言模型重诠&quot;道可道非常道&quot;？</p>
<p>Deepseek的叙述很优美：“当星斗般的像素遇上千年墨痕，当二进制洪流漫过竹简纹路，或许这正是东方智慧最动人的模样——它永远能在青铜鼎与量子芯片之间，生长出新的年轮。”</p>
<p>说白了这两个站子既是我对古卷的临摹帖，也是在这个AI焦虑时代给自己开的一剂&quot;无用&quot;药方。如果哪天你在等地铁时，顺手和AI庄子聊两句&quot;无用之用&quot;，或者用打坐计时器偷得三分钟清净，那就是我码代码时最想听见的&quot;功德+1&quot;声。</p>
<p>最后附上我问AI能否参透拈花微笑时，Deepseek给我的回答：</p>
<pre><code class="language-html"># 公元2025年，人类依然需要  
# 在追问与沉默之间  
# 自己找到第三重答案  
</code></pre>
]]></content>
    </entry>
    <entry>
        <title type="html"><![CDATA[FreeAI - 免费无限制的开源AI助手]]></title>
        <id>https://blog.azad.asia/freeai/</id>
        <link href="https://blog.azad.asia/freeai/">
        </link>
        <updated>2025-04-01T07:25:00.000Z</updated>
        <content type="html"><![CDATA[<h2 id="hey朋友们">👋 Hey，朋友们</h2>
<p>最近我做了一个小项目想分享给大家 —— <strong>FreeAI</strong>，一个基于Pollinations.AI API的开源AI应用平台。它提供了<strong>聊天助手</strong>、<strong>图像生成</strong>和<strong>语音合成</strong>三大核心功能，完全<strong>免费</strong>、<strong>无注册</strong>、<strong>无限制</strong>使用。</p>
<img src="https://github.com/user-attachments/assets/5a76c6b7-0c62-41af-868c-f593d0429adc" alt="ee.png" style="zoom: 60%;" width="70%"  />
<h2 id="为什么做这个项目">🌟 为什么做这个项目？</h2>
<p>作为开发者，我们都知道市面上的AI服务要么收费昂贵，要么有各种使用限制。我想创建一个真正无门槛的AI工具，让每个人都能体验AI的魅力，不受资源和技术的限制。</p>
<h2 id="主要功能">✨ 主要功能</h2>
<p>FreeAI包含三大核心功能，界面设计简洁现代：</p>
<ol>
<li>
<p><strong>💬 AI聊天助手</strong>：回答问题、提供创意建议、编写文本，24小时随叫随到</p>
</li>
<li>
<p><strong>🎨 AI图像生成</strong>：将文字描述转化为高质量图像，支持多种风格和分辨率</p>
</li>
<li>
<p><strong>🔊 AI语音合成</strong>：文本转语音功能，支持多种语言和声音风格，效果自然逼真</p>
</li>
</ol>
<h2 id="立即体验">🚀 立即体验</h2>
<p><strong>体验地址</strong>：<a href="https://freeai.aihub.ren/" target="_blank">freeai.aihub.ren</a></p>
<p><strong>开源地址</strong>：<a href="https://github.com/Azad-sl/FreeAI" target="_blank">Azad-sl/FreeAI</a></p>
<h2 id="如何使用部署">💻 如何使用/部署</h2>
<p>由于FreeAI是纯HTML页面应用，使用和部署非常灵活：</p>
<ol>
<li><strong>本地使用</strong>：下载代码后直接在浏览器中打开HTML文件</li>
<li><strong>部署到服务器</strong>：如果你有自己的服务器，可以直接上传使用</li>
<li><strong>免费托管</strong>：Fork我的仓库并开启GitHub Pages，或部署到Vercel等免费托管平台</li>
</ol>
<p>你还可以自由修改界面和设置，根据自己的需求进行个性化定制。</p>
<h2 id="技术背后">🔍 技术背后</h2>
<p>FreeAI背后使用的是Pollinations.AI提供的API服务。Pollinations是一家总部位于柏林的开源AI初创公司，他们提供了免费且易用的文本和图像生成API，最棒的是<strong>不需要注册或API密钥</strong>就能使用。</p>
<p>在此特别感谢Pollinations.AI团队提供如此优质的免费服务，让更多人能够接触和使用AI技术。</p>
<p>想了解更多关于Pollinations的信息，可以访问他们的官网：<a href="https://pollinations.ai/">https://pollinations.ai/</a></p>
<h2 id="未来计划">🔮 未来计划</h2>
<p>这只是开始，我计划继续改进FreeAI，添加更多功能和优化用户体验。如果你有任何建议或想法，欢迎在GitHub上提交issue或PR，一起让这个工具变得更好！</p>
<hr>
<p>如果你觉得这个项目有用，别忘了在GitHub上给它一个⭐️，你的支持是我持续开发的动力！</p>
<p><strong>Happy Coding! 🚀</strong></p>
]]></content>
    </entry>
    <entry>
        <title type="html"><![CDATA[爱的五种语言]]></title>
        <id>https://blog.azad.asia/lovelanguage/</id>
        <link href="https://blog.azad.asia/lovelanguage/">
        </link>
        <updated>2024-08-11T10:31:28.000Z</updated>
        <content type="html"><![CDATA[<p>“爱的五种语言”是由美国心理学家加里·查普曼（Gary Chapman）提出的概念。他在自己的著作《爱的五种语言》中阐述了这一理论。</p>
<p class="note">肯定的言词、精心的时刻、接受礼物、服务的行动和身体的接触</p>
<p>这些语言是人们表达和感受爱意的重要途径，通过了解和应用这些不同的表达方式，可以极大地改善人际关系，尤其是亲密关系中的沟通与理解。</p>
<h1 id="肯定的言词"><strong>肯定的言词</strong></h1>
<ul>
<li><strong>鼓励和赞赏</strong>：在人际交往中，用言语对他人进行积极的评价和赞赏，能够让对方感受到被重视和爱慕。例如，对伴侣的工作成就或外貌进行称赞，可以增强其自信心，同时也表达了你的爱和支持。</li>
<li><strong>口头表达爱意</strong>：直接用语言表述爱意，如说“我爱你”，虽然简单，但却是直接而强有力的爱的表达方式。</li>
<li><strong>书面表达</strong>：通过写信、便条或短信等方式传达爱意和关怀，能够在对方不经意间收到惊喜，感受到思念和关爱。</li>
<li>......</li>
</ul>
<h1 id="精心的时刻"><strong>精心的时刻</strong></h1>
<ul>
<li><strong>共享兴趣和爱好</strong>：共同参与双方都感兴趣的活动，如运动、旅行或艺术欣赏，这不仅能增进彼此的了解，还能加深情感的连接。</li>
<li><strong>专注的陪伴</strong>：在一起的时候，尽量减少干扰，如关闭手机和电视，专心与对方交流，让对方感受到自己在你心中的重要性。</li>
<li><strong>创造特别的时刻</strong>：策划一些特别的日子或惊喜，如纪念日庆祝或一个突然的约会，让这些时刻成为双方珍贵的记忆。</li>
<li>......</li>
</ul>
<h1 id="接受礼物"><strong>接受礼物</strong></h1>
<ul>
<li><strong>物质礼物</strong>：送礼物是一种直观的爱的表达方式，它可以是一个小饰品、一本书或者一束花，通过这些物质载体传达你的情感和思念。</li>
<li><strong>手工制作的礼物</strong>：亲手制作的礼物，如编织的围巾或手绘的画作，带有更多个人情感的投入，能够展示你对对方的关心和用心。</li>
<li><strong>情感的象征</strong>：有些礼物具有特殊的意义，如纪念性的物品，它们不仅是物质的赠送，更是情感共鸣的桥梁。</li>
</ul>
<h1 id="服务的行动"><strong>服务的行动</strong></h1>
<ul>
<li><strong>日常生活帮助</strong>：在生活中为对方分担家务、准备饭菜或者帮助解决问题，通过实际行动减轻对方的负担，表达爱意。</li>
<li><strong>特殊情况的支持</strong>：在对方遇到困难或需要特别关照时，提供必要的帮助和支持，展现你的关心和爱护。</li>
<li><strong>倾听和理解</strong>：在对方需要倾诉时，耐心地听他们讲述，提供一个安全的环境和理解的心态，让他们感到不孤单。</li>
<li>......</li>
</ul>
<h1 id="身体的接触"><strong>身体的接触</strong></h1>
<ul>
<li><strong>日常的亲密接触</strong>：拥抱、亲吻、牵手等日常的身体接触，是表达爱意和情感的直接方式。</li>
<li><strong>特殊时刻的亲密</strong>：在特殊时刻，如分离后的重逢或庆祝时，通过亲密的身体接触增强情感连接。</li>
<li><strong>抚摸和安慰</strong>：在对方感到疲倦或不安时，通过轻轻的抚摸或拥抱给予安慰和支持。</li>
<li>......</li>
</ul>
]]></content>
    </entry>
    <entry>
        <title type="html"><![CDATA[COW项目SD绘画小插件]]></title>
        <id>https://blog.azad.asia/038/</id>
        <link href="https://blog.azad.asia/038/">
        </link>
        <updated>2024-07-09T12:36:59.000Z</updated>
        <content type="html"><![CDATA[<p class="note">仓库<a href="https://github.com/Azad-sl/sd_paint" target="_blank">Azad-sl/sd_paint</a>: <font color='orange'>chatgpt-on-wechat</font>项目插件。</p>
<p>插件名<a href="https://github.com/Azad-sl/sd_paint" target="_blank">sd_paint</a>，主要作用是通过api调取stablediffusion绘画。感谢<a href="https://api.pearktrue.cn/" target="_blank">PearAPI </a>。<br>
<img src="https://tc.azad.asia//blog/202407092043886.png" alt="image-20240709204335731" style="zoom:33%;" /></p>
<p>脚本内容：</p>
<pre><code class="language-python">import requests
import plugins
from plugins import *
from bridge.context import ContextType
from bridge.reply import Reply, ReplyType
from common.log import logger

# 感谢pearAPI
ART_GENERATION_URL = &quot;https://api.pearktrue.cn/api/stablediffusion/&quot;

@plugins.register(name=&quot;sd_paint&quot;,
                  desc=&quot;stablediffusion生成图像&quot;,
                  version=&quot;1.0&quot;,
                  author=&quot;azad&quot;,
                  desire_priority=100)
class sd_paint(Plugin):

    def __init__(self):
        super().__init__()
        self.handlers[Event.ON_HANDLE_CONTEXT] = self.on_handle_context
        logger.info(f&quot;[{__class__.__name__}] inited&quot;)

    def get_help_text(self, **kwargs):
        help_text = &quot;发送【sd绘画 对应的绘画prompt】生成图像&quot;
        return help_text

    def on_handle_context(self, e_context: EventContext):
        # 只处理文本消息
        if e_context['context'].type != ContextType.TEXT:
            return
        content = e_context[&quot;context&quot;].content.strip()

        # 检查是否是绘画生成的指令
        if content.startswith(&quot;sd绘画&quot;) and &quot; &quot; in content:
            prompt = content.split(&quot;sd绘画&quot;, 1)[1].strip()
            logger.info(f&quot;[{__class__.__name__}] 收到绘画生成请求: {prompt}&quot;)
            reply = Reply()
            result = self.sd_paint(prompt)
            if result:
                reply.type = ReplyType.TEXT
                reply.content = result
                e_context[&quot;reply&quot;] = reply
                e_context.action = EventAction.BREAK_PASS
            else:
                reply.type = ReplyType.ERROR
                reply.content = &quot;生成图像失败，请稍后再试。&quot;
                e_context[&quot;reply&quot;] = reply
                e_context.action = EventAction.BREAK_PASS

    def sd_paint(self, prompt, model=&quot;normal&quot;):
        params = {
            &quot;prompt&quot;: prompt,
            &quot;model&quot;: model
        }
        try:
            response = requests.get(url=ART_GENERATION_URL, params=params, timeout=10)
            if response.status_code == 200:
                data = response.json()
                if data.get(&quot;code&quot;) == 200:
                    return f&quot;SD绘画完成。生成图像链接: {data.get('imgurl')}&quot;
                else:
                    logger.error(f&quot;API返回错误信息: {data.get('msg')}&quot;)
                    return None
            else:
                logger.error(f&quot;API返回状态码异常: {response.status_code}&quot;)
                return None
        except Exception as e:
            logger.error(f&quot;API请求异常：{e}&quot;)
            return None
</code></pre>
<h3 id="安装命令">安装命令</h3>
<pre><code class="language-sh">#installp https://github.com/Azad-sl/sd_paint.git
</code></pre>
<h3 id="扫描启用">扫描启用</h3>
<pre><code class="language-shell">#scanp
</code></pre>
<br>
]]></content>
    </entry>
    <entry>
        <title type="html"><![CDATA[COW项目油价查询小插件]]></title>
        <id>https://blog.azad.asia/037/</id>
        <link href="https://blog.azad.asia/037/">
        </link>
        <updated>2024-07-05T04:22:53.000Z</updated>
        <content type="html"><![CDATA[<p class="note">仓库<a href="https://github.com/Azad-sl/query_oil_price" target="_blank">Azad-sl/query_oil_price</a>: <font color='orange'>chatgpt-on-wechat</font></font>项目插件，油价查询</p>
<p>插件名<a href="https://github.com/Azad-sl/query_oil_price" target="_blank">query_oil_price</a>，主要作用是获取对应省份当前的油价。感谢<a href="https://www.hhlqilongzhu.cn/H5_home.php" target="_blank">龙珠API </a>、<a href="https://api.qqsuu.cn/" target="_blank">大米API</a>。</p>
<img src="https://tc.azad.asia//blog/202407051216855.png" alt="image-20240705121620465" style="zoom:40%;" />
<p>脚本内容：</p>
<pre><code class="language-python">import requests
import plugins
from plugins import *
from bridge.context import ContextType
from bridge.reply import Reply, ReplyType
from common.log import logger

# 感谢大米API
OIL_PRICE_API_URL = &quot;https://api.qqsuu.cn/api/dm-oilprice&quot;

@plugins.register(name=&quot;query_oil_price&quot;,
                  desc=&quot;查询油价&quot;,
                  version=&quot;1.0&quot;,
                  author=&quot;Azad&quot;,
                  desire_priority=100)
class query_oil_price(Plugin):

    def __init__(self):
        super().__init__()
        self.handlers[Event.ON_HANDLE_CONTEXT] = self.on_handle_context
        logger.info(f&quot;[{__class__.__name__}] inited&quot;)

    def get_help_text(self, **kwargs):
        help_text = &quot;发送【油价 对应省区】查询对应省份的油价（不要添加“省”字）&quot;
        return help_text

    def on_handle_context(self, e_context: EventContext):
        if e_context['context'].type != ContextType.TEXT:
            return
        content = e_context[&quot;context&quot;].content.strip()
        # 检查是否是油价查询的指令
        if content.startswith(&quot;油价&quot;) and &quot; &quot; in content:
            province = content.split(&quot;油价&quot;, 1)[1].strip()
            logger.info(f&quot;[{__class__.__name__}] 收到油价查询请求: {province}&quot;)
            reply = Reply()
            result = self.get_oil_price(province)
            if result:
                reply.type = ReplyType.TEXT
                reply.content = result
                e_context[&quot;reply&quot;] = reply
                e_context.action = EventAction.BREAK_PASS
            else:
                reply.type = ReplyType.ERROR
                reply.content = &quot;获取油价失败，请稍后再试。&quot;
                e_context[&quot;reply&quot;] = reply
                e_context.action = EventAction.BREAK_PASS

    def get_oil_price(self, province):
        params = {&quot;prov&quot;: province}
        try:
            response = requests.get(url=OIL_PRICE_API_URL, params=params, timeout=10)
            if response.status_code == 200:
                data = response.json()
                if data[&quot;code&quot;] == 200:
                    province_data = data[&quot;data&quot;]
                    formatted_output = f&quot;{province_data['prov']}的油价信息（更新时间：{province_data['time']}）：\n&quot;
                    oil_types = [&quot;p0&quot;, &quot;p89&quot;, &quot;p92&quot;, &quot;p95&quot;, &quot;p98&quot;]
                    for oil_type in oil_types:
                        if oil_type in province_data:
                            price = province_data[oil_type]
                            if oil_type == &quot;p0&quot;:
                                gas_type = &quot;0号柴油&quot;
                            elif oil_type == &quot;p89&quot;:
                                gas_type = &quot;89号汽油&quot;
                            else:
                                gas_type = f&quot;{oil_type[1:]}号汽油&quot;
                            formatted_output += f&quot;{gas_type}: {price}元/升\n&quot;
                    return formatted_output.strip()
                else:
                    logger.error(f&quot;API返回错误信息: {data['msg']}&quot;)
                    return None
            else:
                logger.error(f&quot;接口返回值异常: 状态码 {response.status_code}&quot;)
                return None
        except Exception as e:
            logger.error(f&quot;接口异常：{e}&quot;)
            return None
</code></pre>
<h2 id="安装命令">安装命令</h2>
<pre><code class="language-sh">#installp https://github.com/Azad-sl/query_oil_price.git
</code></pre>
<h2 id="启用">启用</h2>
<pre><code class="language-shell">#scanp
</code></pre>
<br>
]]></content>
    </entry>
    <entry>
        <title type="html"><![CDATA[国内开放注册图书馆一览]]></title>
        <id>https://blog.azad.asia/036/</id>
        <link href="https://blog.azad.asia/036/">
        </link>
        <updated>2024-06-06T04:51:43.000Z</updated>
        <content type="html"><![CDATA[<p class="note">搬运自<a href="https://forum.freemdict.com/t/topic/22781/1" target="_blank">FreeMdict Forum论坛 - 国内开放注册图书馆一览</a></p>
<h1 id="国家级开放图书馆"><strong>国家级开放图书馆</strong></h1>
<table>
<thead>
<tr>
<th style="text-align:center">名称</th>
<th style="text-align:center">数字资源</th>
</tr>
</thead>
<tbody>
<tr>
<td style="text-align:center">中国国家数字图书馆</td>
<td style="text-align:center"><a href="http://read.nlc.cn/outRes/outResList?type=%E5%85%A8%E9%83%A8">读者云门户 </a></td>
</tr>
</tbody>
</table>
<h1 id="省级开放图书馆"><strong>省级开放图书馆</strong></h1>
<table>
<thead>
<tr>
<th style="text-align:left">名称</th>
<th style="text-align:left">数字资源</th>
</tr>
</thead>
<tbody>
<tr>
<td style="text-align:left">首都图书馆</td>
<td style="text-align:left"><a href="https://d.naccl.top/4ShNy9">数字资源_首都图书馆 </a></td>
</tr>
<tr>
<td style="text-align:left">重庆图书馆</td>
<td style="text-align:left"><a href="https://elib.cqlib.cn:8081/interlibSSO/main/main.jsp">重庆图书馆-电子资源馆外访问系统 </a></td>
</tr>
<tr>
<td style="text-align:left">辽宁省图书馆</td>
<td style="text-align:left"><a href="https://d.naccl.top/15DAjf">辽宁省图书馆-电子资源馆外访问系统 </a></td>
</tr>
<tr>
<td style="text-align:left">浙江省图书馆</td>
<td style="text-align:left"><a href="http://zjisa.zjlib.cn/home/zy_home.jsp">浙江省公共图书馆资源服务门户 </a></td>
</tr>
<tr>
<td style="text-align:left">安徽省图书馆</td>
<td style="text-align:left"><a href="http://szzy.ahlib.com:8099/portal/commercial?name=%E5%95%86%E7%94%A8%E8%B5%84%E6%BA%90%E5%BA%93&amp;pagetype=3">安徽省图书馆·数字资源共享服务平台 </a></td>
</tr>
<tr>
<td style="text-align:left">福建省图书馆</td>
<td style="text-align:left"><a href="https://s.fjlib.net:6443/interlibSSO/main/main.jsp">福建省图书馆-电子资源馆外访问系统</a></td>
</tr>
<tr>
<td style="text-align:left">江西省图书馆</td>
<td style="text-align:left"><a href="https://www.jxlibrary.net/channels/190.html">江西省图书馆官网-资源</a></td>
</tr>
<tr>
<td style="text-align:left">山西省图书馆</td>
<td style="text-align:left"><a href="https://lib.sx.cn/node/491.jspx">山西省图书馆</a></td>
</tr>
<tr>
<td style="text-align:left">湖北省图书馆</td>
<td style="text-align:left"><a href="http://digi.library.hb.cn:20080/#/szzy/list?page=1&amp;size=15&amp;title=&amp;resourceType=&amp;buyStatus=&amp;langType=&amp;sortType=view_count&amp;uid=">湖数-数字资源 </a></td>
</tr>
<tr>
<td style="text-align:left">广东省立中山图书馆</td>
<td style="text-align:left"><a href="https://www.zslib.com.cn/TempletPage/ResourcesList.html?S=zs">广东省立中山图书馆－电子资源</a></td>
</tr>
<tr>
<td style="text-align:left">四川图书馆</td>
<td style="text-align:left"><a href="https://d.naccl.top/2JCU2p">四川省图书馆-数字资源-电子资源馆外访问系统 </a></td>
</tr>
<tr>
<td style="text-align:left">贵州省图书馆</td>
<td style="text-align:left"><a href="https://www.gzlib.org/">贵州数字图书馆 </a></td>
</tr>
<tr>
<td style="text-align:left">新疆图书馆</td>
<td style="text-align:left"><a href="https://xjlib.mh.chaoxing.com/engine2/m/EAC19328B24072E4?p=266336">新疆图书馆-数字资源</a></td>
</tr>
<tr>
<td style="text-align:left">广西壮族自治区图书馆</td>
<td style="text-align:left"><a href="https://res.gxlib.org.cn/ermsClient/browse.do">广西壮族自治区图书馆-数字资源平台 </a></td>
</tr>
</tbody>
</table>
<h1 id="地级市开放图书馆"><strong>地级市开放图书馆</strong></h1>
<table>
<thead>
<tr>
<th style="text-align:left">名称</th>
<th style="text-align:left">数字资源</th>
</tr>
</thead>
<tbody>
<tr>
<td style="text-align:left">绍兴数字图书馆</td>
<td style="text-align:left"><a href="https://www.sxlib.com/qklwwgzy/index.htm">绍兴图书馆-数字资源</a></td>
</tr>
<tr>
<td style="text-align:left">杭州图书馆</td>
<td style="text-align:left"><a href="https://d.naccl.top/lhFsA">电子资源---杭州图书馆 </a></td>
</tr>
<tr>
<td style="text-align:left">南昌市图书馆</td>
<td style="text-align:left"><a href="https://ilares.nclib.net:8000/login.html">南昌市图书馆-远程访问系统 </a></td>
</tr>
<tr>
<td style="text-align:left">武汉图书馆</td>
<td style="text-align:left"><a href="https://www.whlib.org.cn/engine2/general/more?t=32ACE3A4FB2E01EBDB4FE2BF32D400DD960E64535FDF00424F07BAF9CE13C7E71E91B7184C1C5FE4">武汉图书馆-数字资源</a></td>
</tr>
<tr>
<td style="text-align:left">长春市图书馆</td>
<td style="text-align:left"><a href="https://www.ccelib.cn/zydh">资源导航-长春市图书馆 </a></td>
</tr>
</tbody>
</table>
<h1 id="开放注册方法">【开放注册方法】</h1>
<h2 id="官网注册"><strong>官网注册</strong></h2>
<p>这种方式对于用户的限制最少，仅需填写少量信息即可完成注册，实为上上之选。可惜，满足条件的数目很少。</p>
<table>
<thead>
<tr>
<th style="text-align:left"><strong>名称</strong></th>
<th style="text-align:left"><strong>注册网址</strong></th>
</tr>
</thead>
<tbody>
<tr>
<td style="text-align:left">国家数字图书馆</td>
<td style="text-align:left"><a href="https://d.naccl.top/25tl9P">https://d.naccl.top/25tl9P 23</a></td>
</tr>
<tr>
<td style="text-align:left">广东省立中山图书馆</td>
<td style="text-align:left"><a href="https://d.naccl.top/2eR2Wd">https://d.naccl.top/2eR2Wd 16</a></td>
</tr>
<tr>
<td style="text-align:left">贵州数字图书馆</td>
<td style="text-align:left"><a href="https://d.naccl.top/2XIzJl">https://d.naccl.top/2XIzJl 8</a></td>
</tr>
<tr>
<td style="text-align:left">广西壮族自治区图书馆</td>
<td style="text-align:left"><a href="https://d.naccl.top/VcESh">https://d.naccl.top/VcESh 8</a></td>
</tr>
</tbody>
</table>
<h2 id="微信公众号注册"><strong>微信公众号注册：</strong></h2>
<p>有些图书馆，虽然在官网上仅允许线下注册，但实际上公众号后台早已放出了注册渠道，具体的注册步骤大体相同：微信搜索并关注公众号，然后按照下表列示的注册顺序逐步执行，最后填写个人信息即可。</p>
<table>
<thead>
<tr>
<th><strong>名称</strong></th>
<th><strong>注册顺序</strong></th>
</tr>
</thead>
<tbody>
<tr>
<td>国家图书馆</td>
<td>服务–手机门户–个人中心–注册</td>
</tr>
<tr>
<td>首都图书馆</td>
<td>遇首图–首图服务–注册读者卡</td>
</tr>
<tr>
<td>重庆图书馆</td>
<td>服务大厅–在线办证</td>
</tr>
<tr>
<td>辽宁省图书馆</td>
<td>辽图微悦–读者注册</td>
</tr>
<tr>
<td>福建省图书馆</td>
<td>微服务大厅–办数字证</td>
</tr>
<tr>
<td>广东省立中山图书馆</td>
<td>快速办理–办证粤读通</td>
</tr>
<tr>
<td>四川省图书馆</td>
<td>服务大厅–读者注册</td>
</tr>
<tr>
<td>南昌市图书馆</td>
<td>微服务大厅–在线办证</td>
</tr>
</tbody>
</table>
<h2 id="支付宝生活号注册"><strong>支付宝生活号注册：</strong></h2>
<p>支付宝内搜索“<code>xxx图书馆</code>”，点击进入相应生活号主页，然后找到在线办证入口，填写相应信息即可。</p>
<table>
<thead>
<tr>
<th><strong>名称</strong></th>
<th><strong>注册要求</strong></th>
</tr>
</thead>
<tbody>
<tr>
<td>浙江省图书馆</td>
<td>芝麻信用分550以上</td>
</tr>
<tr>
<td>安徽省图书馆</td>
<td>芝麻信用分550以上</td>
</tr>
<tr>
<td>江西省图书馆</td>
<td>芝麻信用分550以上</td>
</tr>
<tr>
<td>湖北省图书馆</td>
<td>芝麻信用分650以上</td>
</tr>
<tr>
<td>广东省立中山图书馆</td>
<td>芝麻信用分550以上</td>
</tr>
<tr>
<td>广西壮族自治区图书馆</td>
<td>芝麻信用分550以上</td>
</tr>
<tr>
<td>绍兴图书馆</td>
<td>芝麻信用分550以上</td>
</tr>
</tbody>
</table>
<h2 id="借阅宝定点注册"><strong>借阅宝定点注册：</strong></h2>
<p>有些图书馆并未独立运营支付宝生活号，而是将之托管在了统一的第三方服务平台——<code>借阅宝生活号（长春市图书馆为“嘉图借书”）</code>。该方式与上一种注册方式相似，均依托于支付宝，均需验证芝麻信用分，但步骤上要相对麻烦一些。具体为：在支付宝内搜索进入“<code>借阅宝</code>”生活号 —&gt; 点击进入“<code>服务</code>”菜单栏下的“<code>图书馆</code>” —&gt; 将地址“切换”到对应地区的图书馆 —&gt; 点击页面中下部的<code>注册借阅证</code>。</p>
<table>
<thead>
<tr>
<th><strong>名称</strong></th>
<th><strong>注册要求</strong></th>
</tr>
</thead>
<tbody>
<tr>
<td>浙江省图书馆</td>
<td>芝麻信用分550以上</td>
</tr>
<tr>
<td>安徽省图书馆</td>
<td>芝麻信用分550以上</td>
</tr>
<tr>
<td>江西省图书馆</td>
<td>芝麻信用分550以上</td>
</tr>
<tr>
<td>湖北省图书馆</td>
<td>芝麻信用分650以上</td>
</tr>
<tr>
<td>广东省立中山图书馆</td>
<td>芝麻信用分550以上</td>
</tr>
<tr>
<td>广西壮族自治区图书馆</td>
<td>芝麻信用分550以上</td>
</tr>
<tr>
<td>绍兴图书馆</td>
<td>芝麻信用分550以上</td>
</tr>
</tbody>
</table>
<br>]]></content>
    </entry>
    <entry>
        <title type="html"><![CDATA[数据库中存储并显示emoji]]></title>
        <id>https://blog.azad.asia/035/</id>
        <link href="https://blog.azad.asia/035/">
        </link>
        <updated>2024-05-31T05:04:31.000Z</updated>
        <content type="html"><![CDATA[<p>在数据库中正确存储和显示包含表情符号（<code>emoji</code>），应该使用适合的字符编码和存储格式。确保数据库表和列使用支持Unicode的字符集，例如<code>utf8mb4</code>，这是<code>MySQL</code>中对表情符号最友好的字符集。</p>
<ul>
<li>
<p>可以用以下<code>SQL</code>命令检查和修改字符集（如果尚未设置为<code>utf8mb4</code>）：</p>
<pre><code class="language-sql">ALTER TABLE your_table_name CONVERT TO CHARACTER SET utf8mb4 COLLATE utf8mb4_unicode_ci;
</code></pre>
</li>
</ul>
<h2 id="注意事项">注意事项</h2>
<ul>
<li><strong>字符集</strong>：<code>utf8</code>在<code>MySQL</code>中不支持4字节字符（如大部分<code>emoji</code>），因此使用<code>utf8mb4</code>。</li>
<li><strong>前端显示</strong>：确保前端网页或应用也使用支持<code>UTF-8</code>字符集的编码（如<code>&lt;meta charset=&quot;UTF-8&quot;&gt;</code>）。</li>
</ul>
<h2 id="宝塔面板的具体操作步骤">宝塔面板的具体操作步骤：</h2>
<ol>
<li>
<p><strong>登录宝塔面板</strong>：</p>
<ul>
<li>打开宝塔面板并登录。</li>
</ul>
</li>
<li>
<p><strong>打开终端</strong>：</p>
<ul>
<li>在左侧菜单中，找到并点击“终端”选项。</li>
</ul>
</li>
<li>
<p><strong>连接到MySQL</strong>：</p>
<ul>
<li>
<p>在终端中输入以下命令来连接到<code>MySQL</code>数据库，<font color='orange'>假设你的数据库名是<code>my_database</code>，表名是<code>articles</code>，并且你使用的是<code>root</code>用户</font>：</p>
<pre><code class="language-sh">mysql -u root -p
</code></pre>
</li>
<li>
<p>然后输入<code>MySQL</code>的密码。</p>
</li>
</ul>
</li>
<li>
<p><strong>选择数据库</strong>：</p>
<ul>
<li>
<p>连接到<code>MySQL</code>后，选择你的数据库：</p>
<pre><code class="language-sh">USE my_database;
</code></pre>
</li>
</ul>
</li>
<li>
<p><strong>执行ALTER TABLE命令</strong>：</p>
<ul>
<li>
<p>输入并执行以下命令来修改表的字符集和排序规则：</p>
<pre><code class="language-sh">ALTER TABLE articles CONVERT TO CHARACTER SET utf8mb4 COLLATE utf8mb4_unicode_ci;
</code></pre>
</li>
</ul>
</li>
<li>
<p><strong>注意事项</strong>：</p>
</li>
</ol>
<ul>
<li><strong>备份数据</strong>：在执行任何修改操作之前，最好先备份你的数据库，以防万一出现错误。</li>
<li><strong>权限</strong>：确保你使用的<code>MySQL</code>用户具有足够的权限来执行这些操作。</li>
<li><strong>兼容性</strong>：检查<code>MySQL</code>版本是否支持<code>utf8mb4</code>字符集（<code>MySQL 5.5.3</code>及以上版本支持）。</li>
</ul>
<br>
]]></content>
    </entry>
    <entry>
        <title type="html"><![CDATA[诗是一种经验与感觉。]]></title>
        <id>https://blog.azad.asia/034/</id>
        <link href="https://blog.azad.asia/034/">
        </link>
        <updated>2024-02-28T02:52:55.000Z</updated>
        <content type="html"><![CDATA[<iframe frameborder="no" border="0" marginwidth="0" marginheight="0" width="88%" height=90 src="//music.163.com/outchain/player?type=2&id=1227532&auto=0&height=66"  ></iframe>
<br><br>
诗是一种经验与感觉。
<p>和饥饿一样。和痛苦一样。和吃饭喝水一样。和冬日的太阳一样。和城市的灯火一样。和心上人的眼眸一样。和丰收的喜悦一样和贫瘠的叹息一样。和空荡荡的稻田与稻田的空荡荡一样。和冥古宙几百万年的雨一样。和布满疤痕与创伤的石像一样。和一次漫长的旅行一样。和特拉克尔的不安一样，整个大地都是灵魂的异乡。</p>
<p>和我脚下的通惠河一样，我的黑色屋顶，在我头上静静流淌。和篝火一样。一种奇异而高的声音。引导众人歌唱。和夜晚的阴影与稍纵即逝的光芒。</p>
<p>和形形色色乏善可陈的平庸与匆忙一样。和彩虹般的遮羞布一样。</p>
<p>和虚无一样和思想一样和幸福一样和流浪一样……</p>
<p>和爱一样。</p>
<p>。</p>
<br>]]></content>
    </entry>
    <entry>
        <title type="html"><![CDATA[搭建微信AI机器人]]></title>
        <id>https://blog.azad.asia/033/</id>
        <link href="https://blog.azad.asia/033/">
        </link>
        <updated>2024-02-01T14:35:12.000Z</updated>
        <content type="html"><![CDATA[<h1 id="1-购买服务器">1. 购买服务器</h1>
<p>首先，你需要购买一台云服务器，常见的云服务提供商包括阿里云、腾讯云、华为云等。选择一个适合你需求的云服务器，并购买相应的服务套餐，单纯用于搭建ai机器人一核一G的配置就足够了。</p>
<ul>
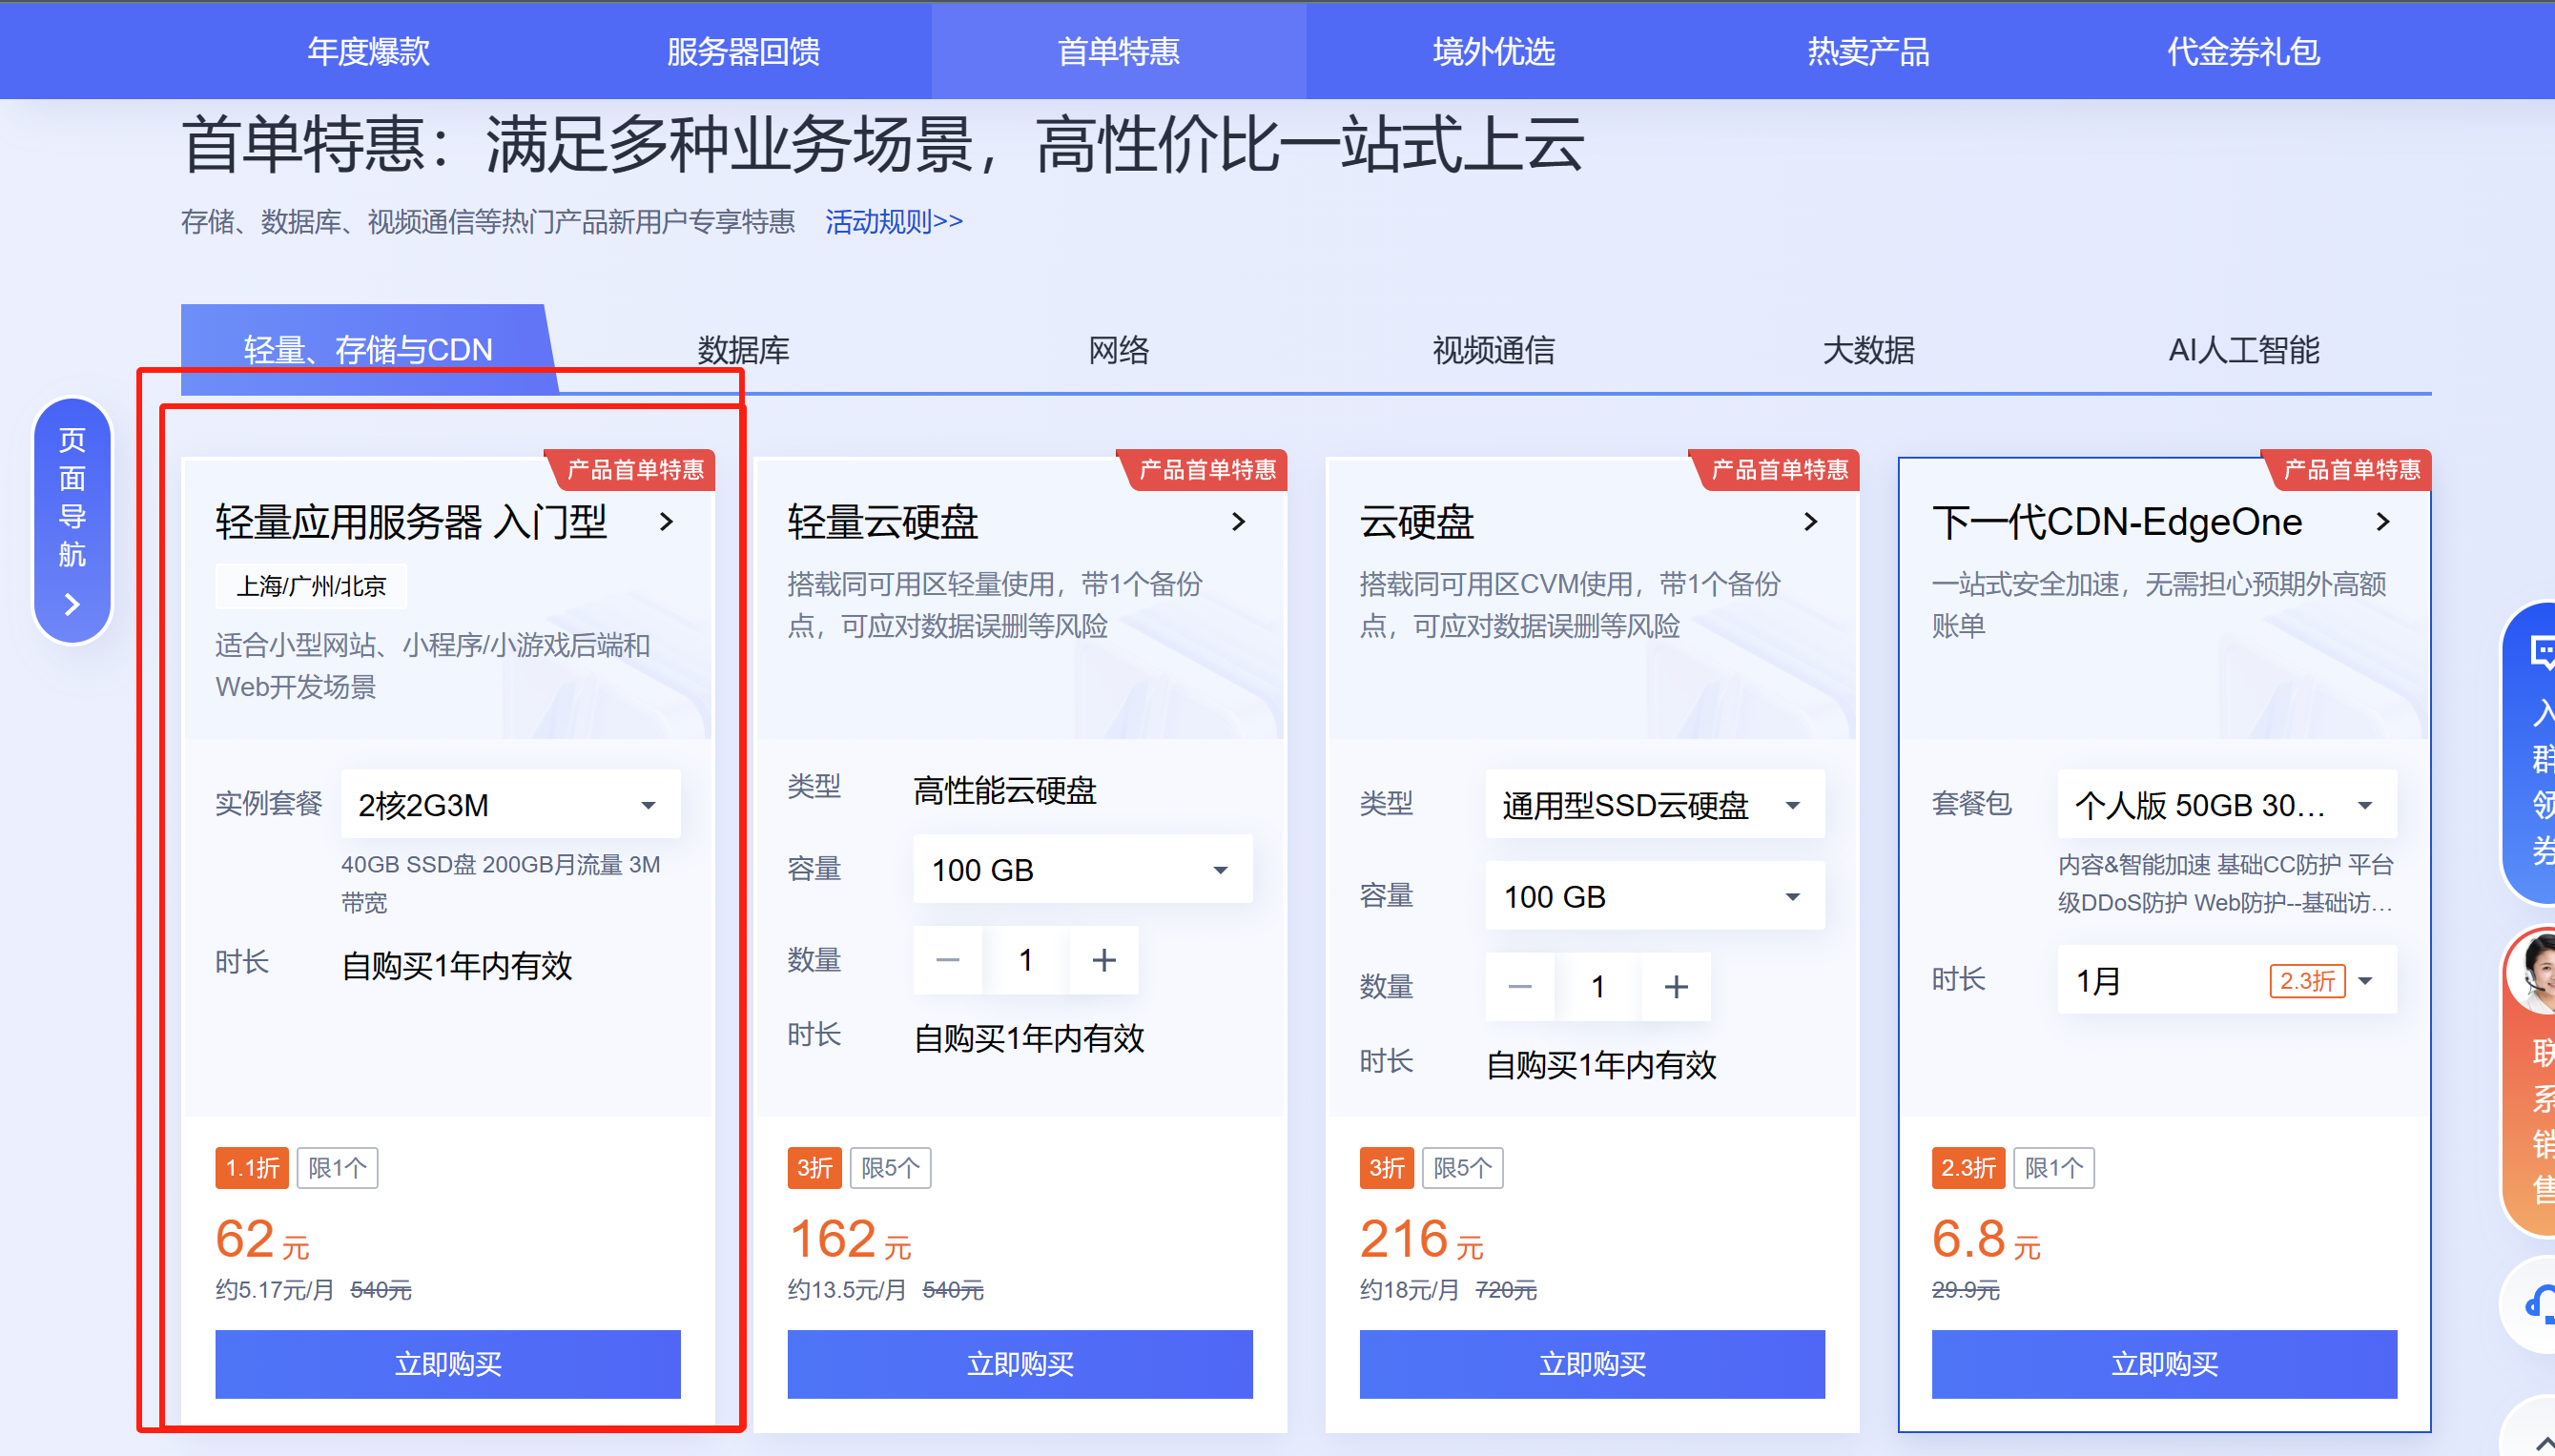
<li>如果要对接国内的ai大模型，比如文心一言、讯飞星火，可以选择国内的云服务商。<strong>推荐<a href="https://curl.qcloud.com/Z6UHZ1L3">腾讯云的2核2G轻量应用服务器</a>，目前新人优惠62元一年。</strong></li>
</ul>
<img src="https://tc.azad.asia//blog/202401280030838.png" alt="image-20240128003055354" style="zoom:25%;" />
<ul>
<li>如果要对接国外的AI大模型，比如ChatGPT，建议选择国外的云服务商。<strong>推荐<a href="https://blog.azad.asia/028/">RN的1核1G性价比VPS</a>，支持支付宝。</strong></li>
</ul>
<h1 id="2-连接服务器">2. 连接服务器</h1>
<p>购买完成，使用SSH（Secure Shell）工具连接到你的服务器。你可以使用命令行工具（如Terminal或PuTTY）输入以下命令：</p>
<pre><code class="language-bash">ssh your_username@your_server_ip
</code></pre>
<p>替换 <code>your_username</code> 和 <code>your_server_ip</code> 为你的服务器用户名和IP地址。</p>
<h1 id="3-安装宝塔面板">3. 安装宝塔面板</h1>
<h2 id="31-下载宝塔面板安装脚本">3.1 下载宝塔面板安装脚本</h2>
<p>在连接到服务器后，下载宝塔面板的安装脚本。可以使用以下命令：</p>
<pre><code class="language-bash">wget -O install.sh http://download.bt.cn/install/install_6.0.sh
</code></pre>
<h2 id="32-运行安装脚本">3.2 运行安装脚本</h2>
<p>运行下载的安装脚本：</p>
<pre><code class="language-bash">bash install.sh
</code></pre>
<p>安装过程中，按照提示进行配置。你可以选择默认配置，或者根据自己的需求进行定制。</p>
<h2 id="33-访问宝塔面板">3.3 访问宝塔面板</h2>
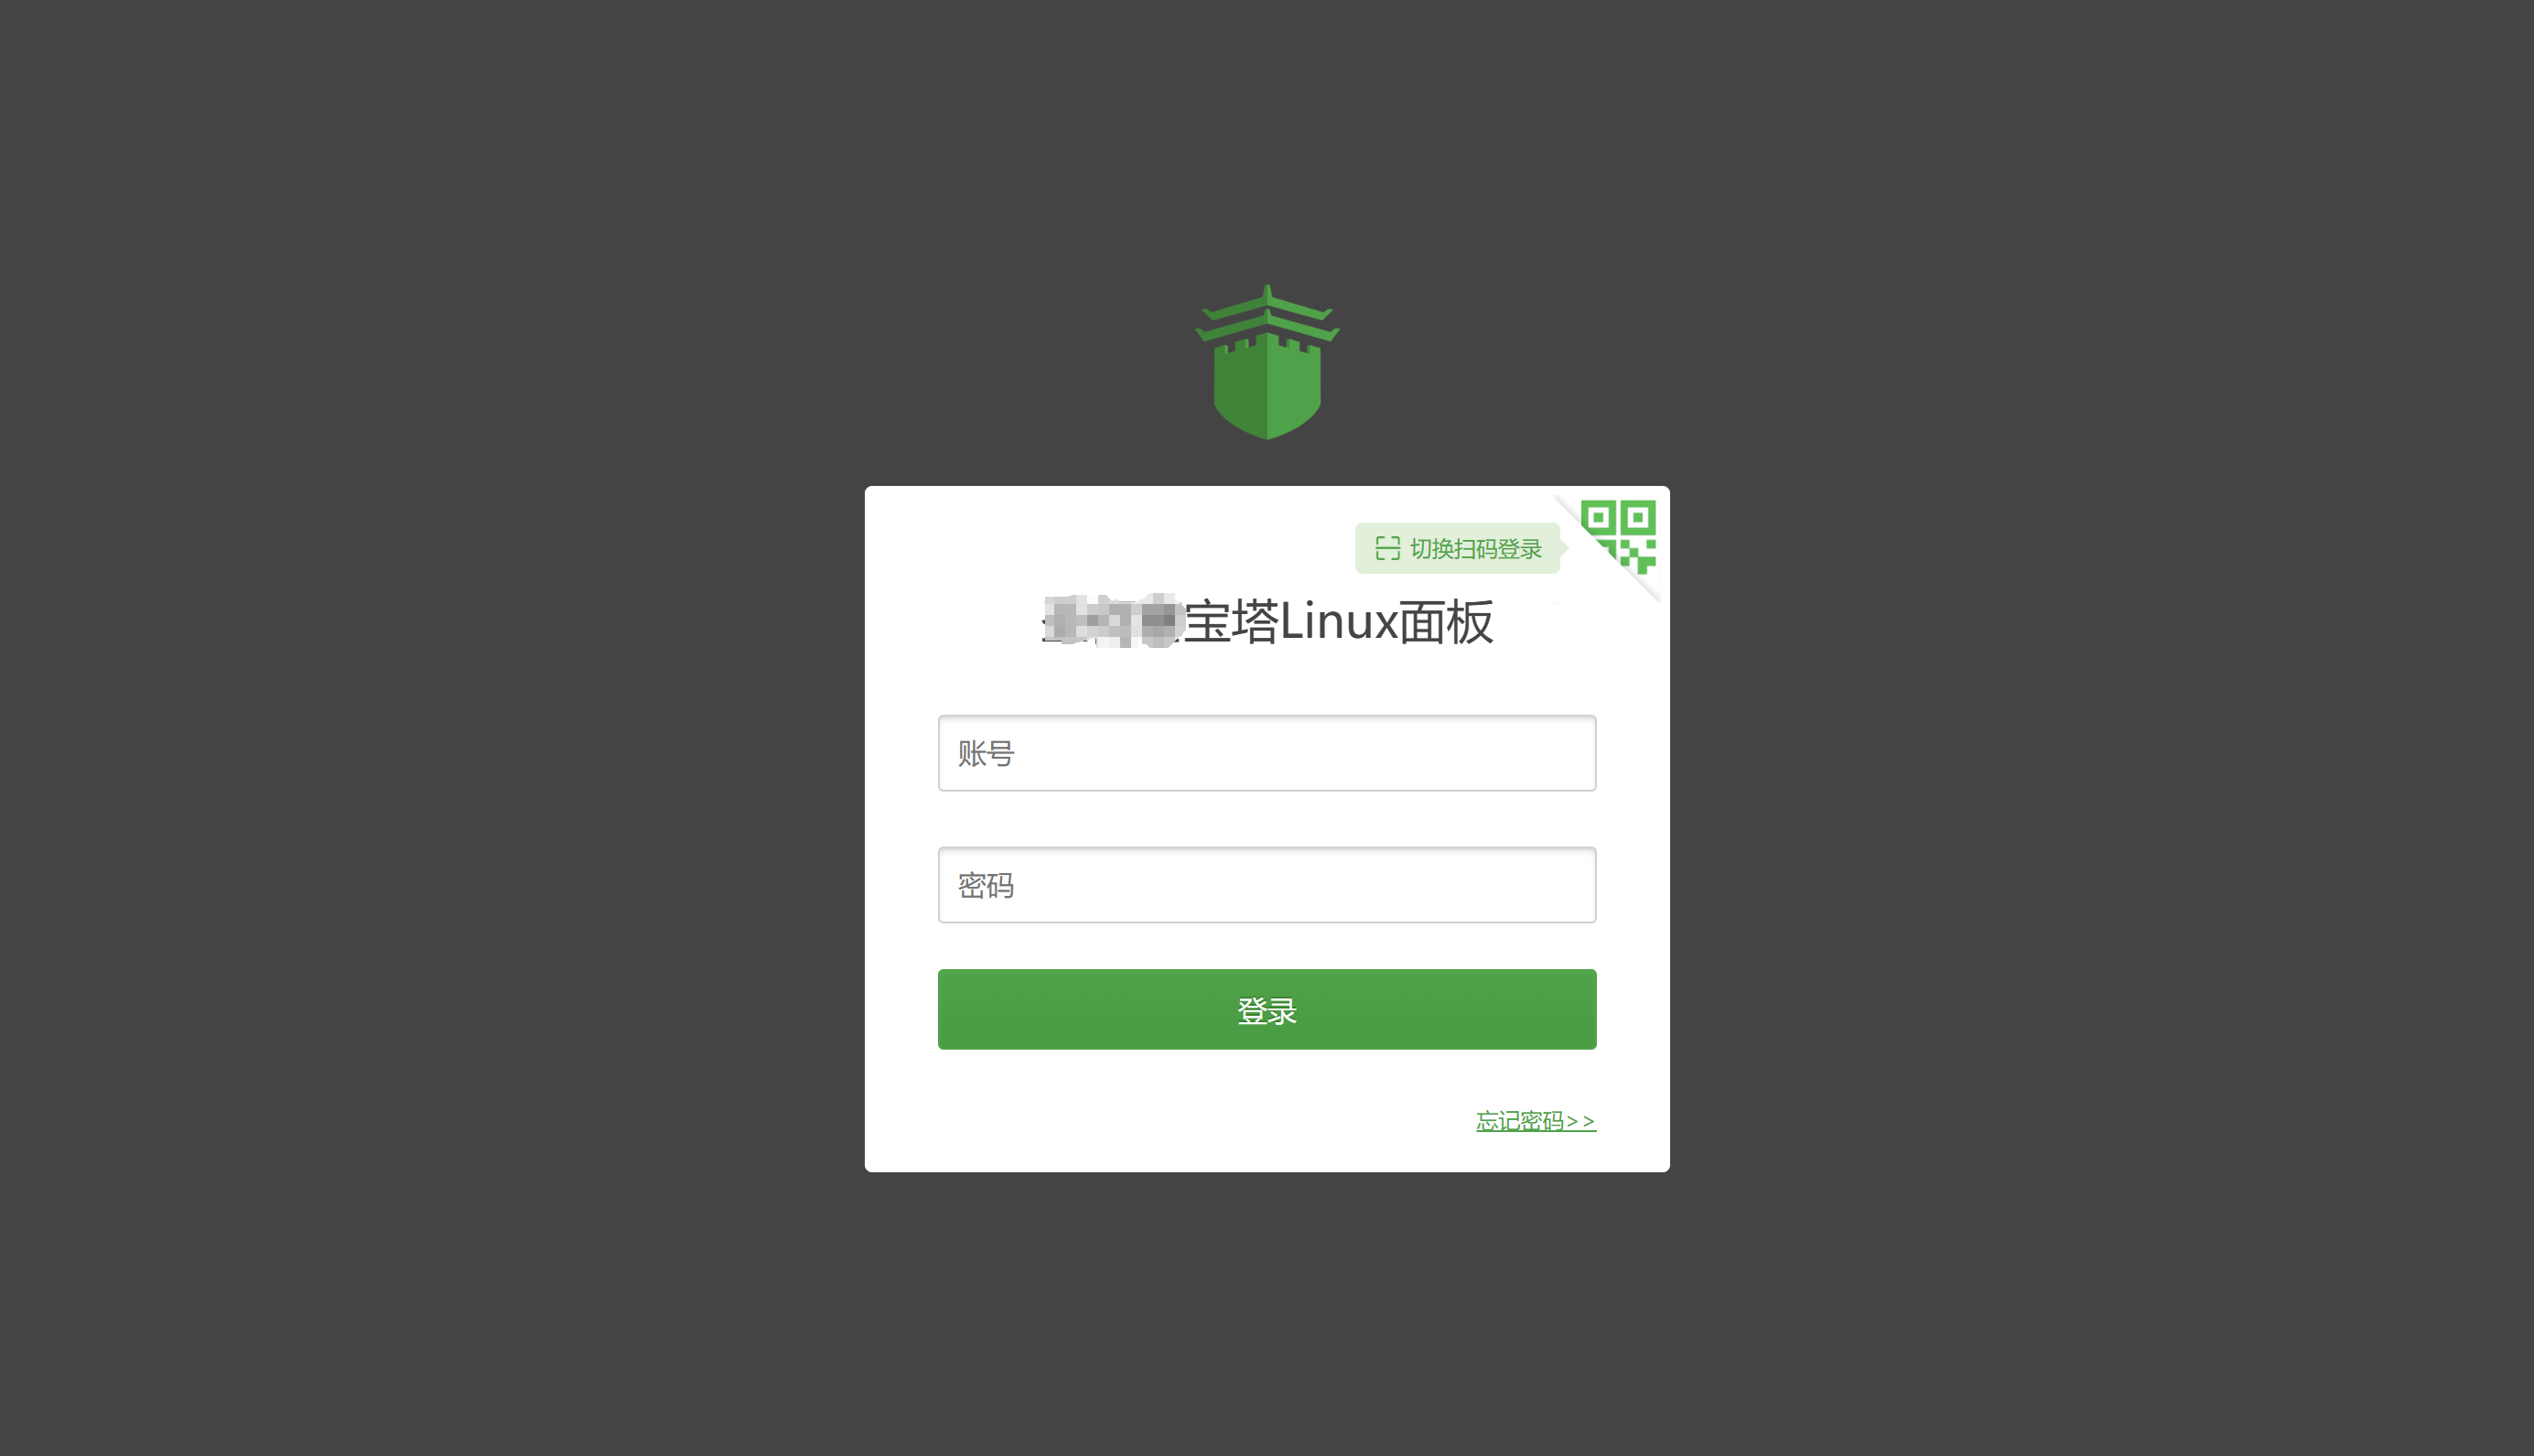
<p>安装完成后，通过浏览器访问 <code>http://your_server_ip:8888</code>，使用刚刚设置的用户名和密码登录宝塔面板。</p>
<img src="https://tc.azad.asia//blog/202402011450290.png" alt="image-20240201145036109" style="zoom:25%;" />
<h1 id="4-部署微信ai机器人">4. 部署微信AI机器人</h1>
<p>这里直接用开源程序<a href="https://github.com/zhayujie/chatgpt-on-wechat">chatgpt-on-wechat: 基于大模型搭建的微信聊天机器人</a>，以下简称<code>COW</code>。该项目是基于大模型的智能对话机器人，支持微信、企业微信、公众号、飞书、钉钉接入，可选择GPT3.5/GPT4.0/Claude/文心一言/讯飞星火/通义千问/Gemini/LinkAI，能处理文本、语音和图片，通过插件访问操作系统和互联网等外部资源，支持基于自有知识库定制企业AI应用。</p>
<p><strong>具体部署步骤在项目的<code>Readme.md</code>描述的很详细了</strong>。建议直接参照官方教程。</p>
<p>我这里具体以对接 <code>讯飞星火</code> 为例：</p>
<h2 id="41-申请讯飞星火模型api">4.1 申请讯飞星火模型API</h2>
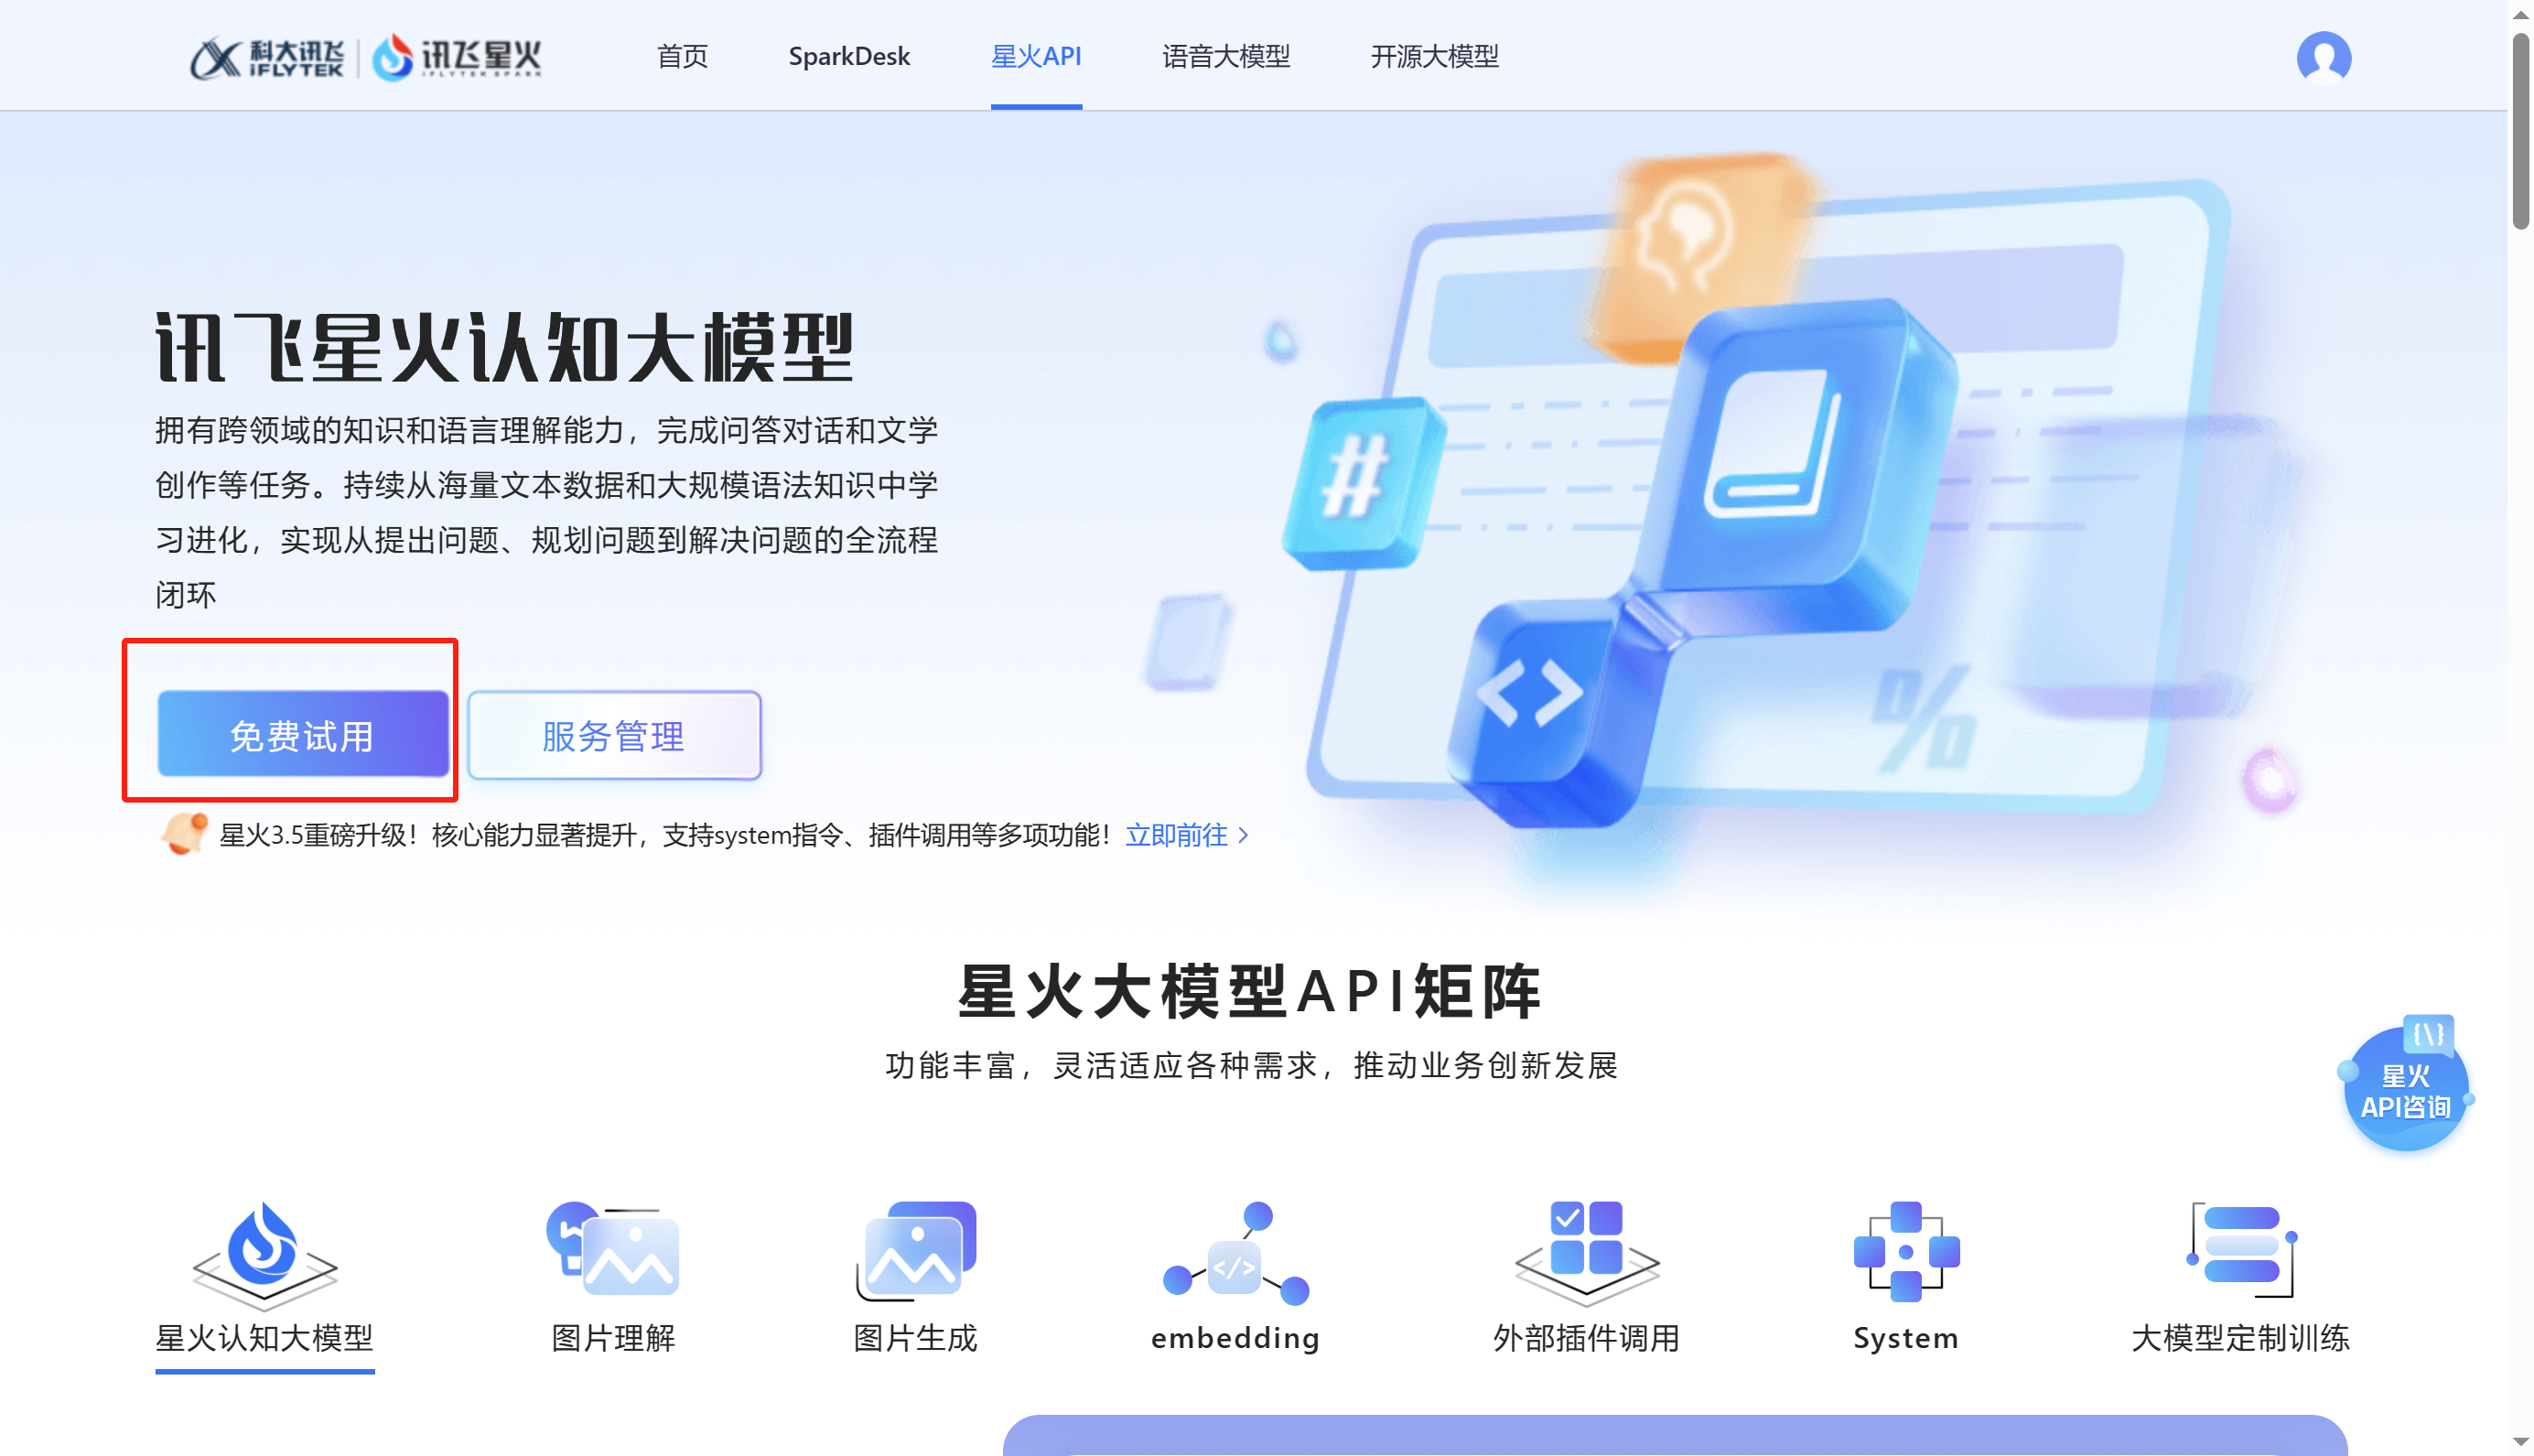
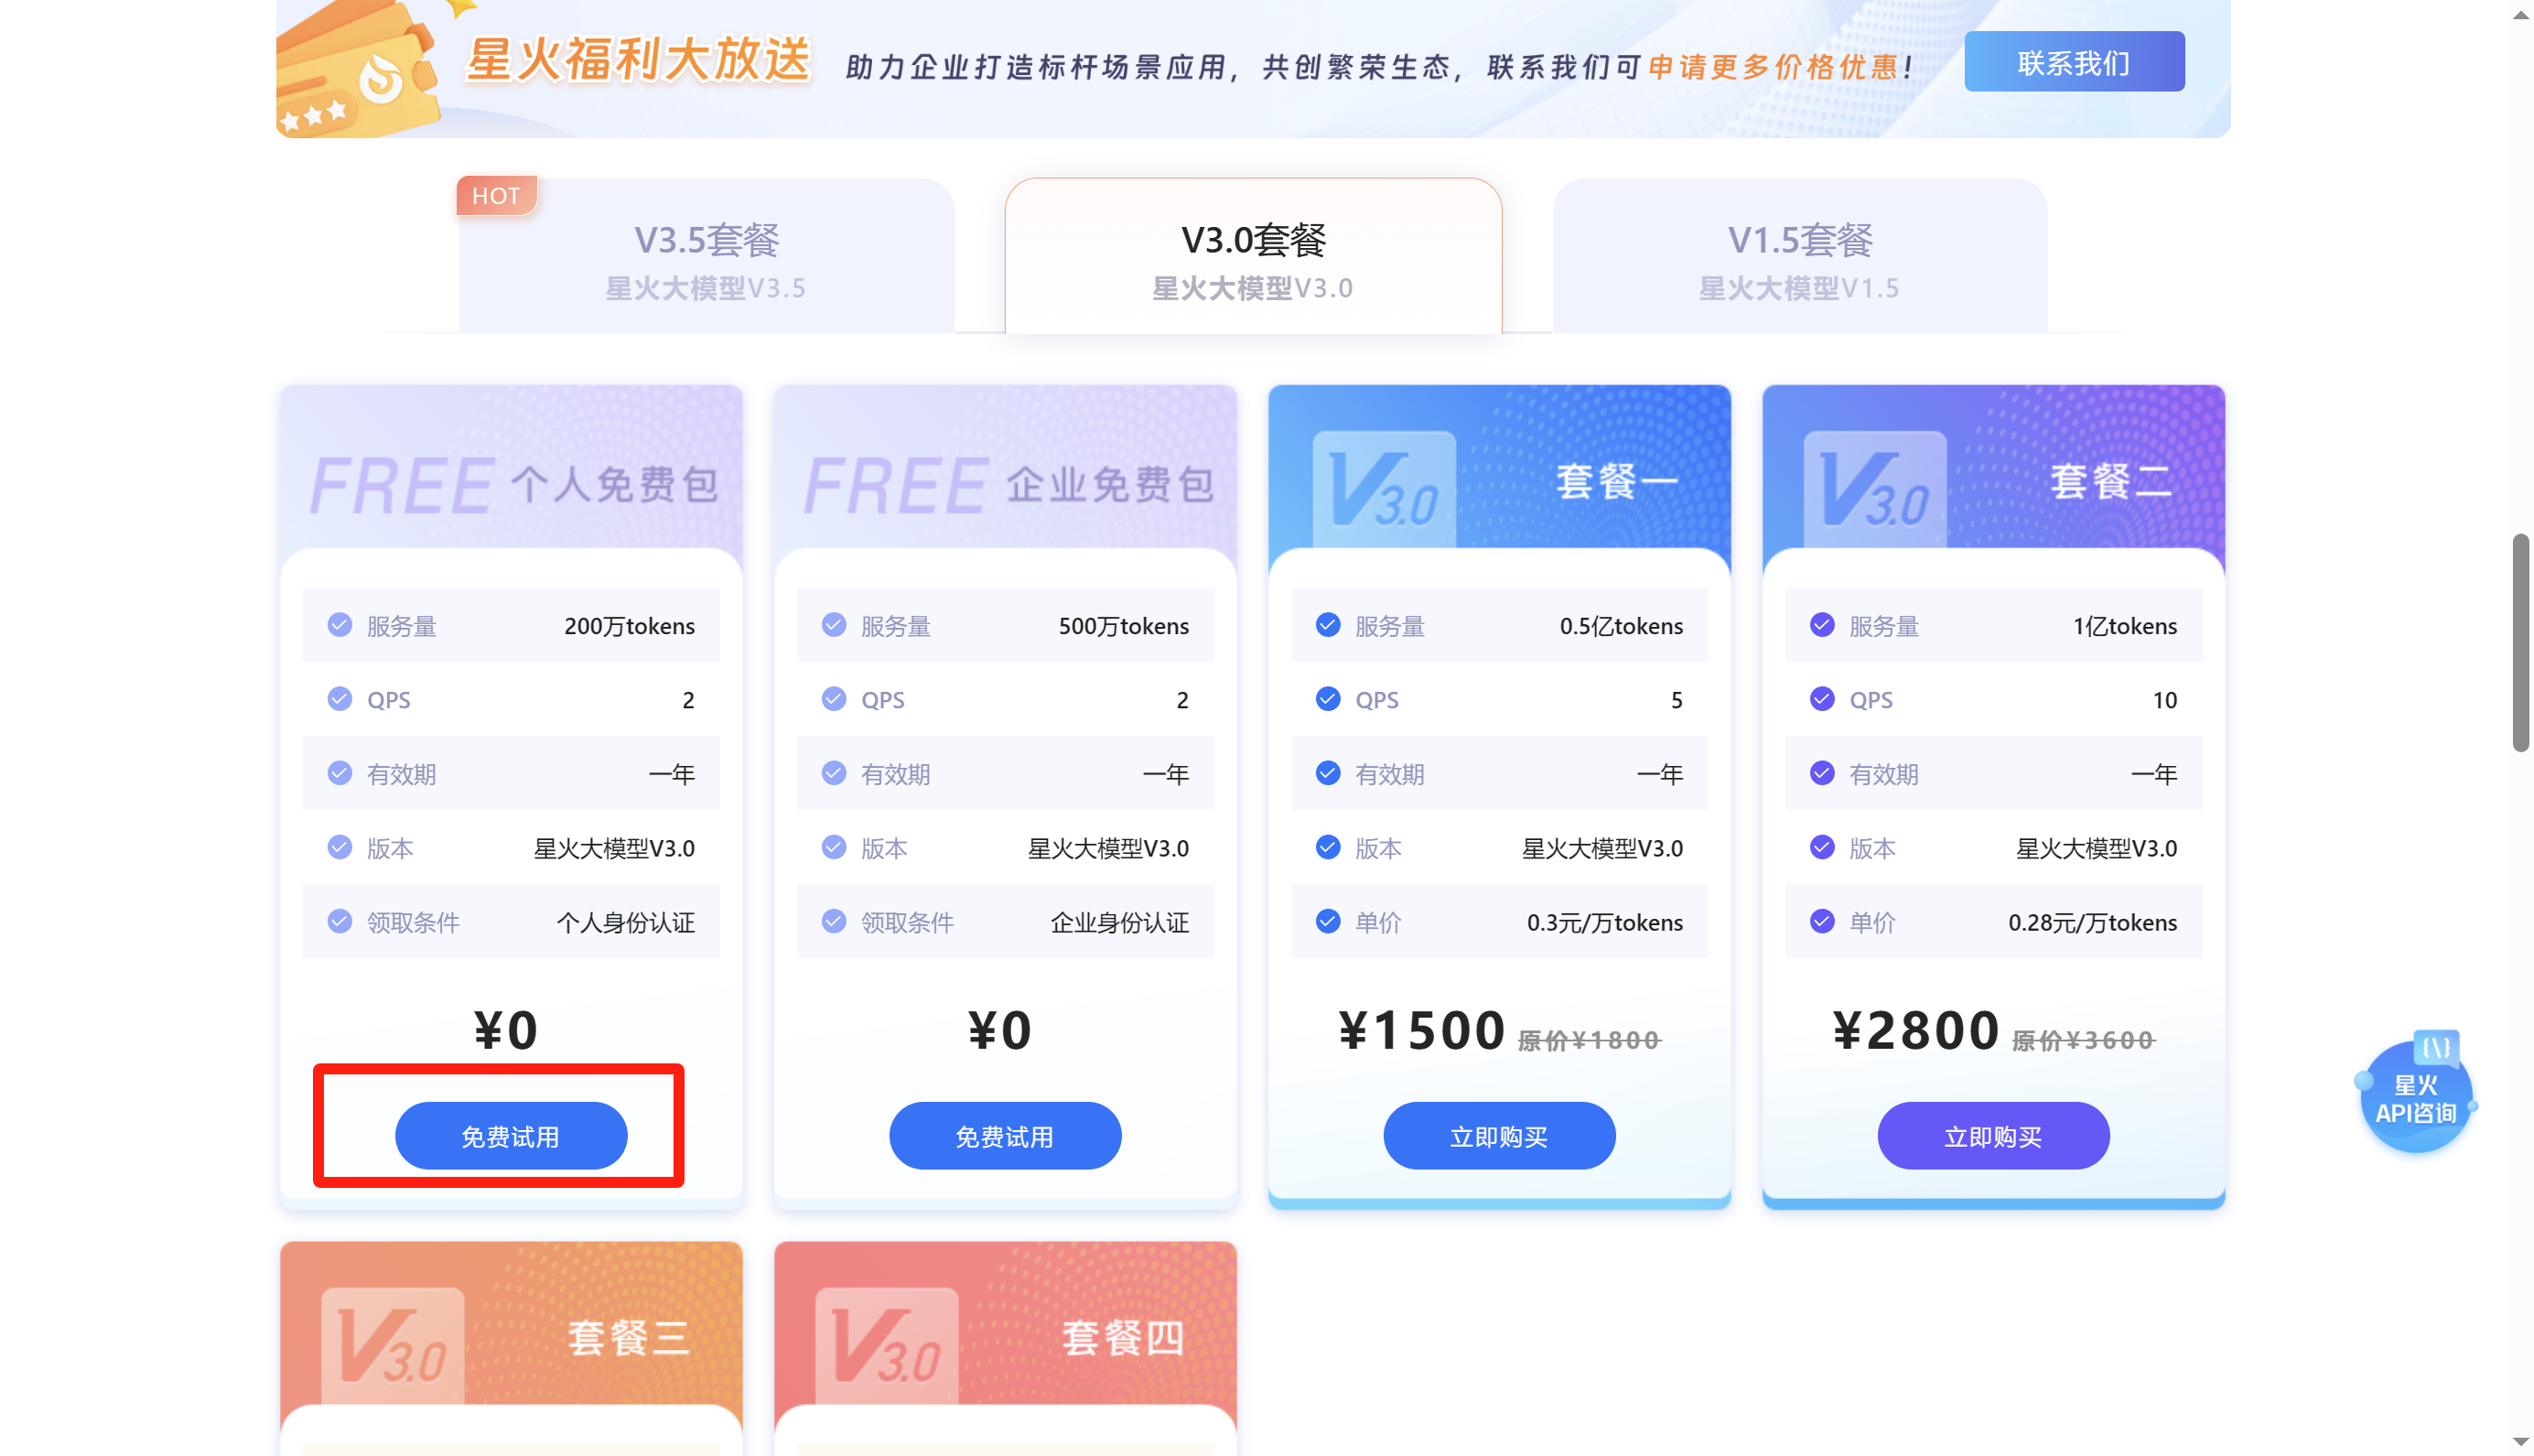
<p>注册登录<a href="https://xinghuo.xfyun.cn/sparkapi">讯飞星火认知大模型</a>，实名认证后，点击免费试用， <strong>领取下方的</strong> <code>V3.0 0元个人免费包</code>（<code>COW</code><strong>项目暂未支持V3.5</strong>） 👇</p>
<img src="https://tc.azad.asia//blog/202402011831341.png" alt="image-20240201183140004" style="zoom: 25%;" />
<img src="https://tc.azad.asia//blog/202402011836639.png" alt="image-20240201183608383" style="zoom:25%;" />
<p>确认支付之后回到主页，点击<code>服务管理</code>，跳转到控制台，中间的token用量显示的就是免费套餐的限额以及有效期，记下右侧的 <code>APPID</code>、<code>APISecret</code>、<code>APIKey</code>。</p>
<img src="https://tc.azad.asia//blog/202402012234711.png" alt="image-20240201223444517" style="zoom:25%;" />
<h2 id="42-配置讯飞星火">4.2 配置讯飞星火</h2>
<p>在<code>config.json</code>中填入配置：</p>
<pre><code class="language-json">{
  &quot;channel_type&quot;: &quot;wx&quot;,
  &quot;model&quot;: &quot;xunfei&quot;,              # 模型名称, 改为xunfei
  &quot;xunfei_app_id&quot;: &quot; &quot;,           # 填入上一步保存的APPID. 
  &quot;xunfei_api_key&quot;: &quot; &quot;,          # 填入上一步保存的APIKEY. 
  &quot;xunfei_api_secret&quot;: &quot; &quot;,       # 填入上一步保存的APISECRET.
  &quot;proxy&quot;: &quot;&quot;,
  &quot;hot_reload&quot;: false,
  &quot;single_chat_prefix&quot;: [
    &quot;xunfei&quot;,&quot;@xunfei&quot;           # 私聊时文本需要包含该前缀才能触发机器人回复，可自定义
  ],
  &quot;single_chat_reply_prefix&quot;: &quot;[xunfei] &quot;,    # 私聊时自动回复的前缀，用于区分真人，可自定义
  &quot;group_chat_prefix&quot;: [
    &quot;@xunfei&quot;                    # 群聊时包含该前缀则会触发机器人回复，可自定义
  ],
  &quot;group_name_white_list&quot;: [
    &quot;讯飞星火测试交流群&quot;,&quot;xxx交流群&quot;              ## 开启自动回复的群名称列表，放在英文引号中，以英文逗分隔
  ],
  &quot;image_create_prefix&quot;: [
    &quot;画&quot;                         # 开启图片回复的前缀，可自定义
  ],
  &quot;speech_recognition&quot;: false,
  &quot;group_speech_recognition&quot;: false,
  &quot;voice_reply_voice&quot;: false,
  &quot;conversation_max_tokens&quot;: 2500,
  &quot;expires_in_seconds&quot;: 3600,
  &quot;character_desc&quot;: &quot;你是讯飞星火, 一个由科大讯飞训练的大型语言模型, 你旨在回答并解决人们的任何问题，并且可以使用多种语言与人交流。&quot;,
  &quot;temperature&quot;: 0.7,
  &quot;subscribe_msg&quot;: &quot;感谢您的关注！\n这里是AI智能助手，可以自由对话。\n支持语音对话。\n支持图片输入。\n支持图片输出，画字开头的消息将按要求创作图片。\n支持tool、角色扮演和文字冒险等丰富的插件。\n输入{trigger_prefix}#help 查看详细指令。&quot;,
  &quot;use_linkai&quot;: false,
  &quot;linkai_api_key&quot;: &quot;&quot;,
  &quot;linkai_app_code&quot;: &quot;&quot;
}
</code></pre>
<p>保存配置，输入命令，扫码运行。</p>
<h2 id="43-可能遇到的问题">4.3 可能遇到的问题</h2>
<p>在安装核心依赖时：</p>
<pre><code class="language-python">pip3 install -r requirements.txt
</code></pre>
<p>如果显示以下类似错误：</p>
<pre><code class="language-python">ERROR: Could not find a version that satisfies the requirement openai==0.27.8 (from versions: 0.0.2…………)
ERROR:No matching distribution found for openai==0.27.8
</code></pre>
<p>可能是python版本问题。输入<code>python3 --version</code>查看默认python版本：</p>
<pre><code class="language-shell">[root@VM-4-15-centos chatgpt-on-wechat] # python3 --version
Python 3.6.8
</code></pre>
<p>一般新装的服务器默认的python版本都是3.6.8。<code>COW</code>建议Python版本在 3.7.1~3.9.X 之间，推荐3.8版本，3.10及以上版本在 MacOS 可用。因此可以用宝塔面板软件商店里的<code>python项目管理器</code>，安装一个3.8.5版本的python。然后搜索一下python 3.8的安装路径，一般是在<code>/www/server/python_manager/versions/3.8.5/bin/python3.8</code>。</p>
<p>更改 <code>python3</code> 符号链接指向 Python 3.8（将<code>/path/to/your/python3.8</code>替换为你上面找到的Python 3.8 的安装路径）：</p>
<pre><code class="language-shell">sudo ln -sf /path/to/your/python3.8 /usr/bin/python3
</code></pre>
<p>运行以下命令验证设置是否生效：</p>
<pre><code class="language-shell">python3 --version
</code></pre>
<p>应该显示安装的 Python 3.8 版本。</p>
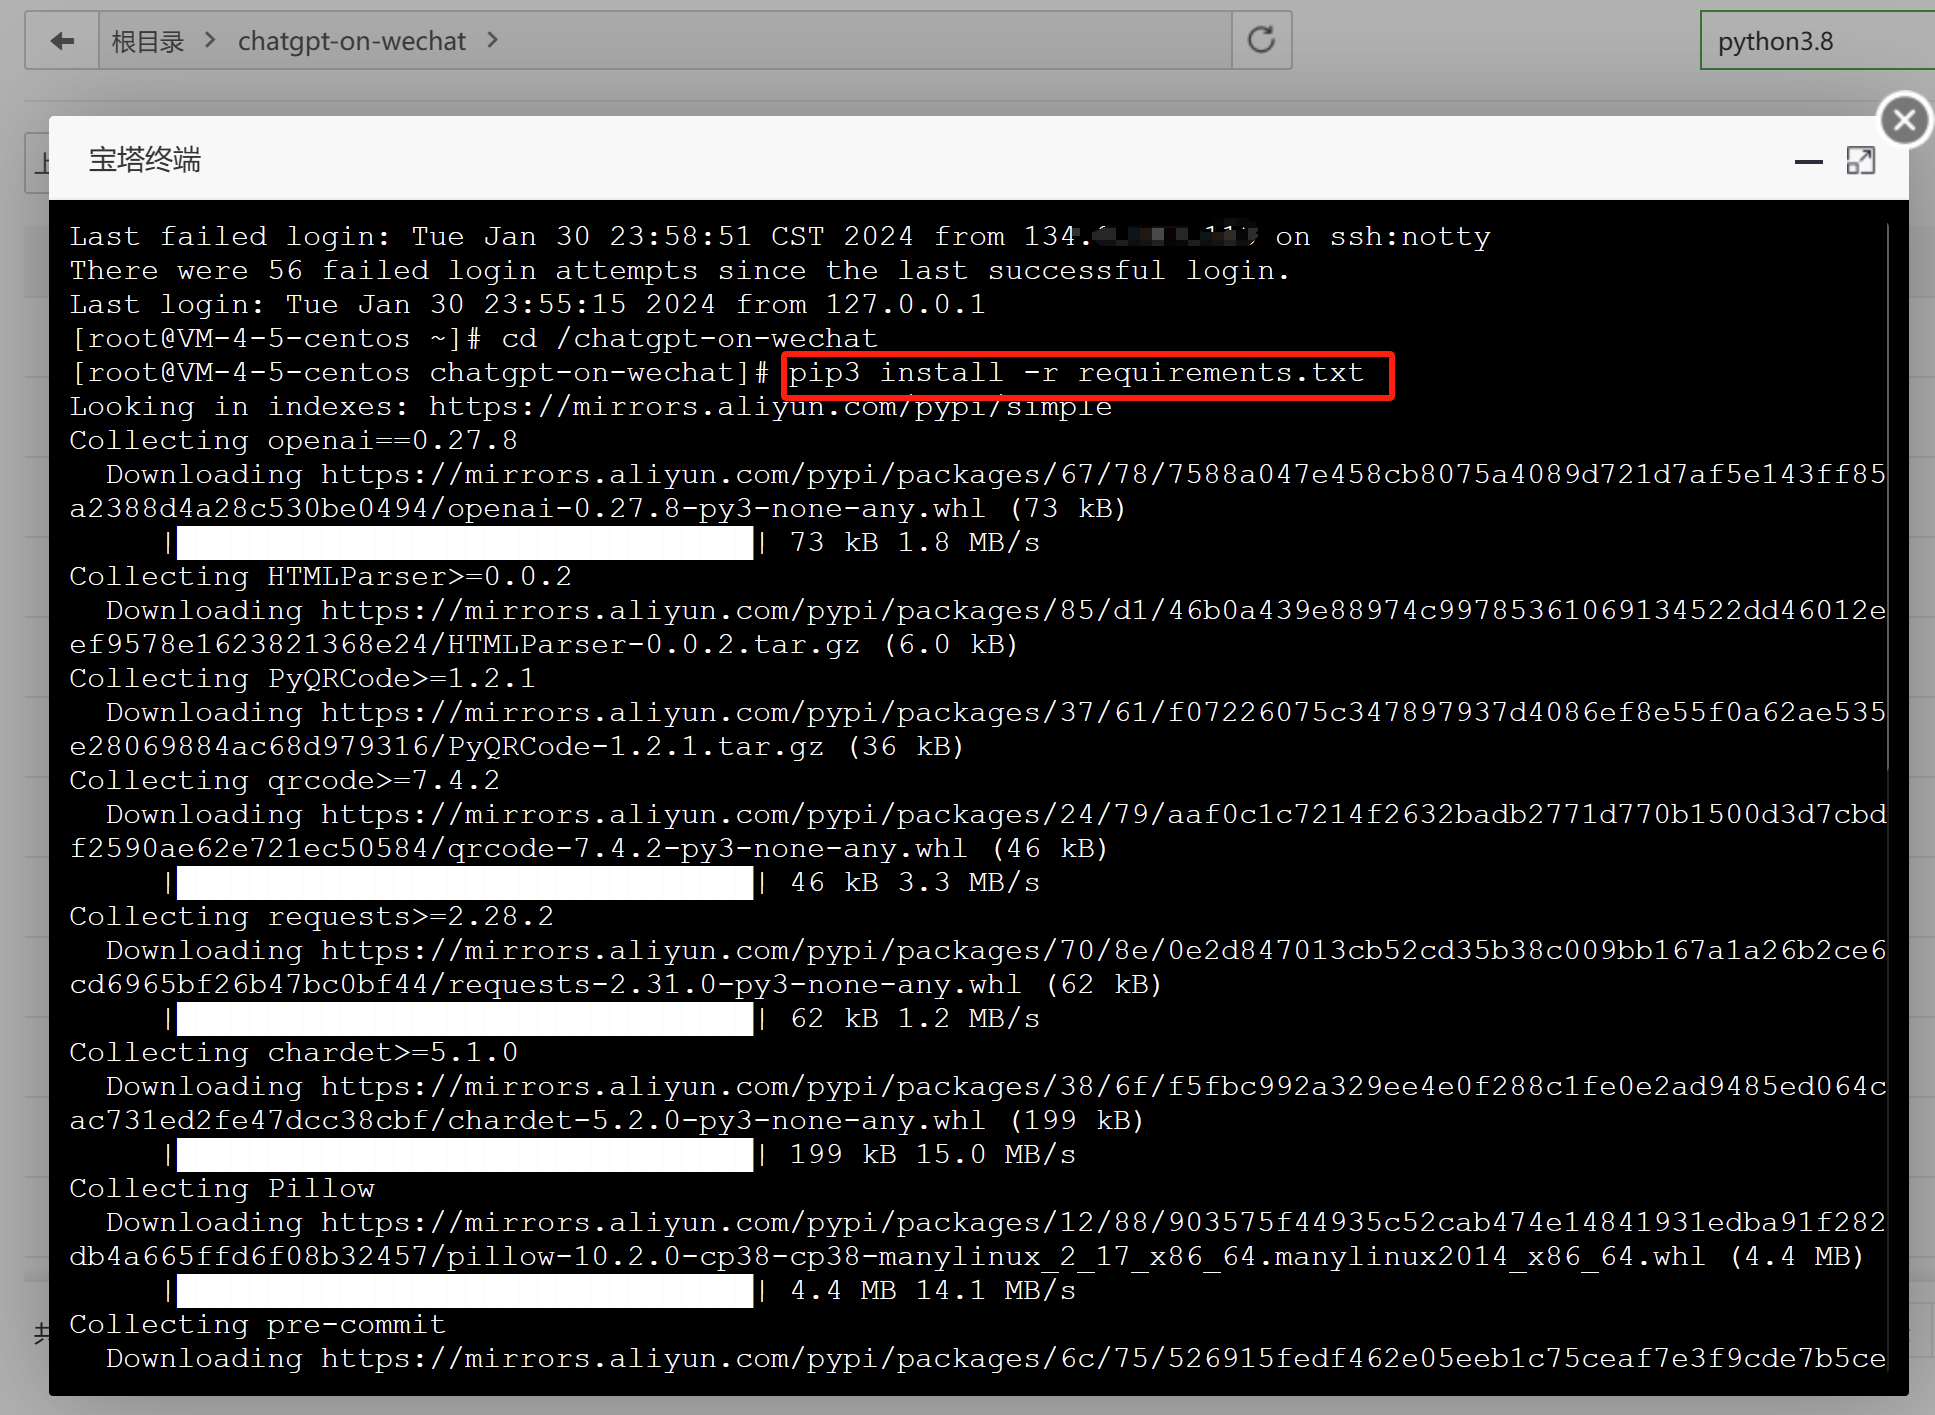
<p>这个时候再返回刚刚那一步，一般可以安装成功：</p>
<pre><code class="language-python">pip3 install -r requirements.txt
</code></pre>
<img src="https://tc.azad.asia//blog/202401310002958.png" alt="image-20240131000206699" style="zoom:85%;" />
<p>再执行最后的运行程序，扫描登录：</p>
<pre><code class="language-shell">nohup python3 app.py &amp; tail -f nohup.out
</code></pre>
<h2 id="44-部署成功">4.4 部署成功</h2>
<p>一旦程序成功启动，日志将记录并返回 &quot;<code>Start auto replying</code>&quot;，这意味着你的登录账号已经成功切换为机器人状态。从此，你的好友发送消息给你或在群聊中@你都将触发自动回复，效果如下图所示：</p>
<img src="https://tc.azad.asia//blog/202402011515073.png" alt="image-20240201151522991" style="zoom:35%;" />
<p>交流测试群：</p>
<img src="https://tc.azad.asia//blog/202402012237699.png" alt="image-20240201223709552" style="zoom:25%;" />
<br>
]]></content>
    </entry>
    <entry>
        <title type="html"><![CDATA[PandoraNext服务器一键部署]]></title>
        <id>https://blog.azad.asia/pandoranext/</id>
        <link href="https://blog.azad.asia/pandoranext/">
        </link>
        <updated>2024-01-01T10:08:00.000Z</updated>
        <content type="html"><![CDATA[<p class="note">项目地址: https://github.com/pandora-next/deploy </p>
<h2 id="简介">简介</h2>
<ul>
<li>Pandora Cloud + Pandora Server + Shared Chat + BackendAPI Proxy + Chat2API = <code>PandoraNext</code></li>
<li>支持GPTs，最新UI。</li>
<li>支持多种登录方式：（相当于Pandora Cloud）
<ul>
<li>账号/密码</li>
<li>Access Token</li>
<li>Session Token</li>
<li>Refresh Token</li>
<li>Share Token</li>
</ul>
</li>
<li>更多请看项目地址。</li>
</ul>
<h4 id="原作者demo">原作者demo</h4>
<p><a href="https://chat1.zhile.io/auth/login?state=5h3obnCUhEOcsVNF1-Na4_YRSXa7Saa6Vtyfo2ySw5sEza-g6vX69FRCglUUfC5ADbaUPBVkP2VAGe6duagHIsaBmy4b39r5zUhgMRs1nU90yec0ak2zJFji">PandoraNext (zhile.io)</a></p>
<h2 id="准备条件">准备条件</h2>
<ul>
<li>一台服务器。RN的1h1g小鸡就完全够用<a href="https://blog.azad.asia/028/">RackNerd高性价比VPS推荐 | Azad's Space</a></li>
<li>你的Github账号的<code>license_id</code></li>
</ul>
<h2 id="教程">教程</h2>
<ol>
<li>给服务器安装docker。一键安装docker脚本：</li>
</ol>
<pre><code class="language-shell">curl -fsSL https://get.docker.com | sh

curl -L &quot;https://github.com/docker/compose/releases/latest/download/docker-compose-$(uname -s)-$(uname -m)&quot; -o /usr/local/bin/docker-compose

chmod +x /usr/local/bin/docker-compose
</code></pre>
<ol start="2">
<li>
<p>开放8181端口并重启防火墙：</p>
<pre><code class="language-shell">firewall-cmd --zone=public --add-port=8181/tcp --permanent

firewall-cmd --reload
</code></pre>
</li>
<li>
<p>部署PandoraNext。一键部署脚本：</p>
</li>
</ol>
<pre><code class="language-shell">curl -sS -O https://raw.githubusercontent.com/woniu336/open_shell/main/pandoranext.sh &amp;&amp; chmod +x pandoranext.sh &amp;&amp; ./pandoranext.sh
</code></pre>
<ol start="4">
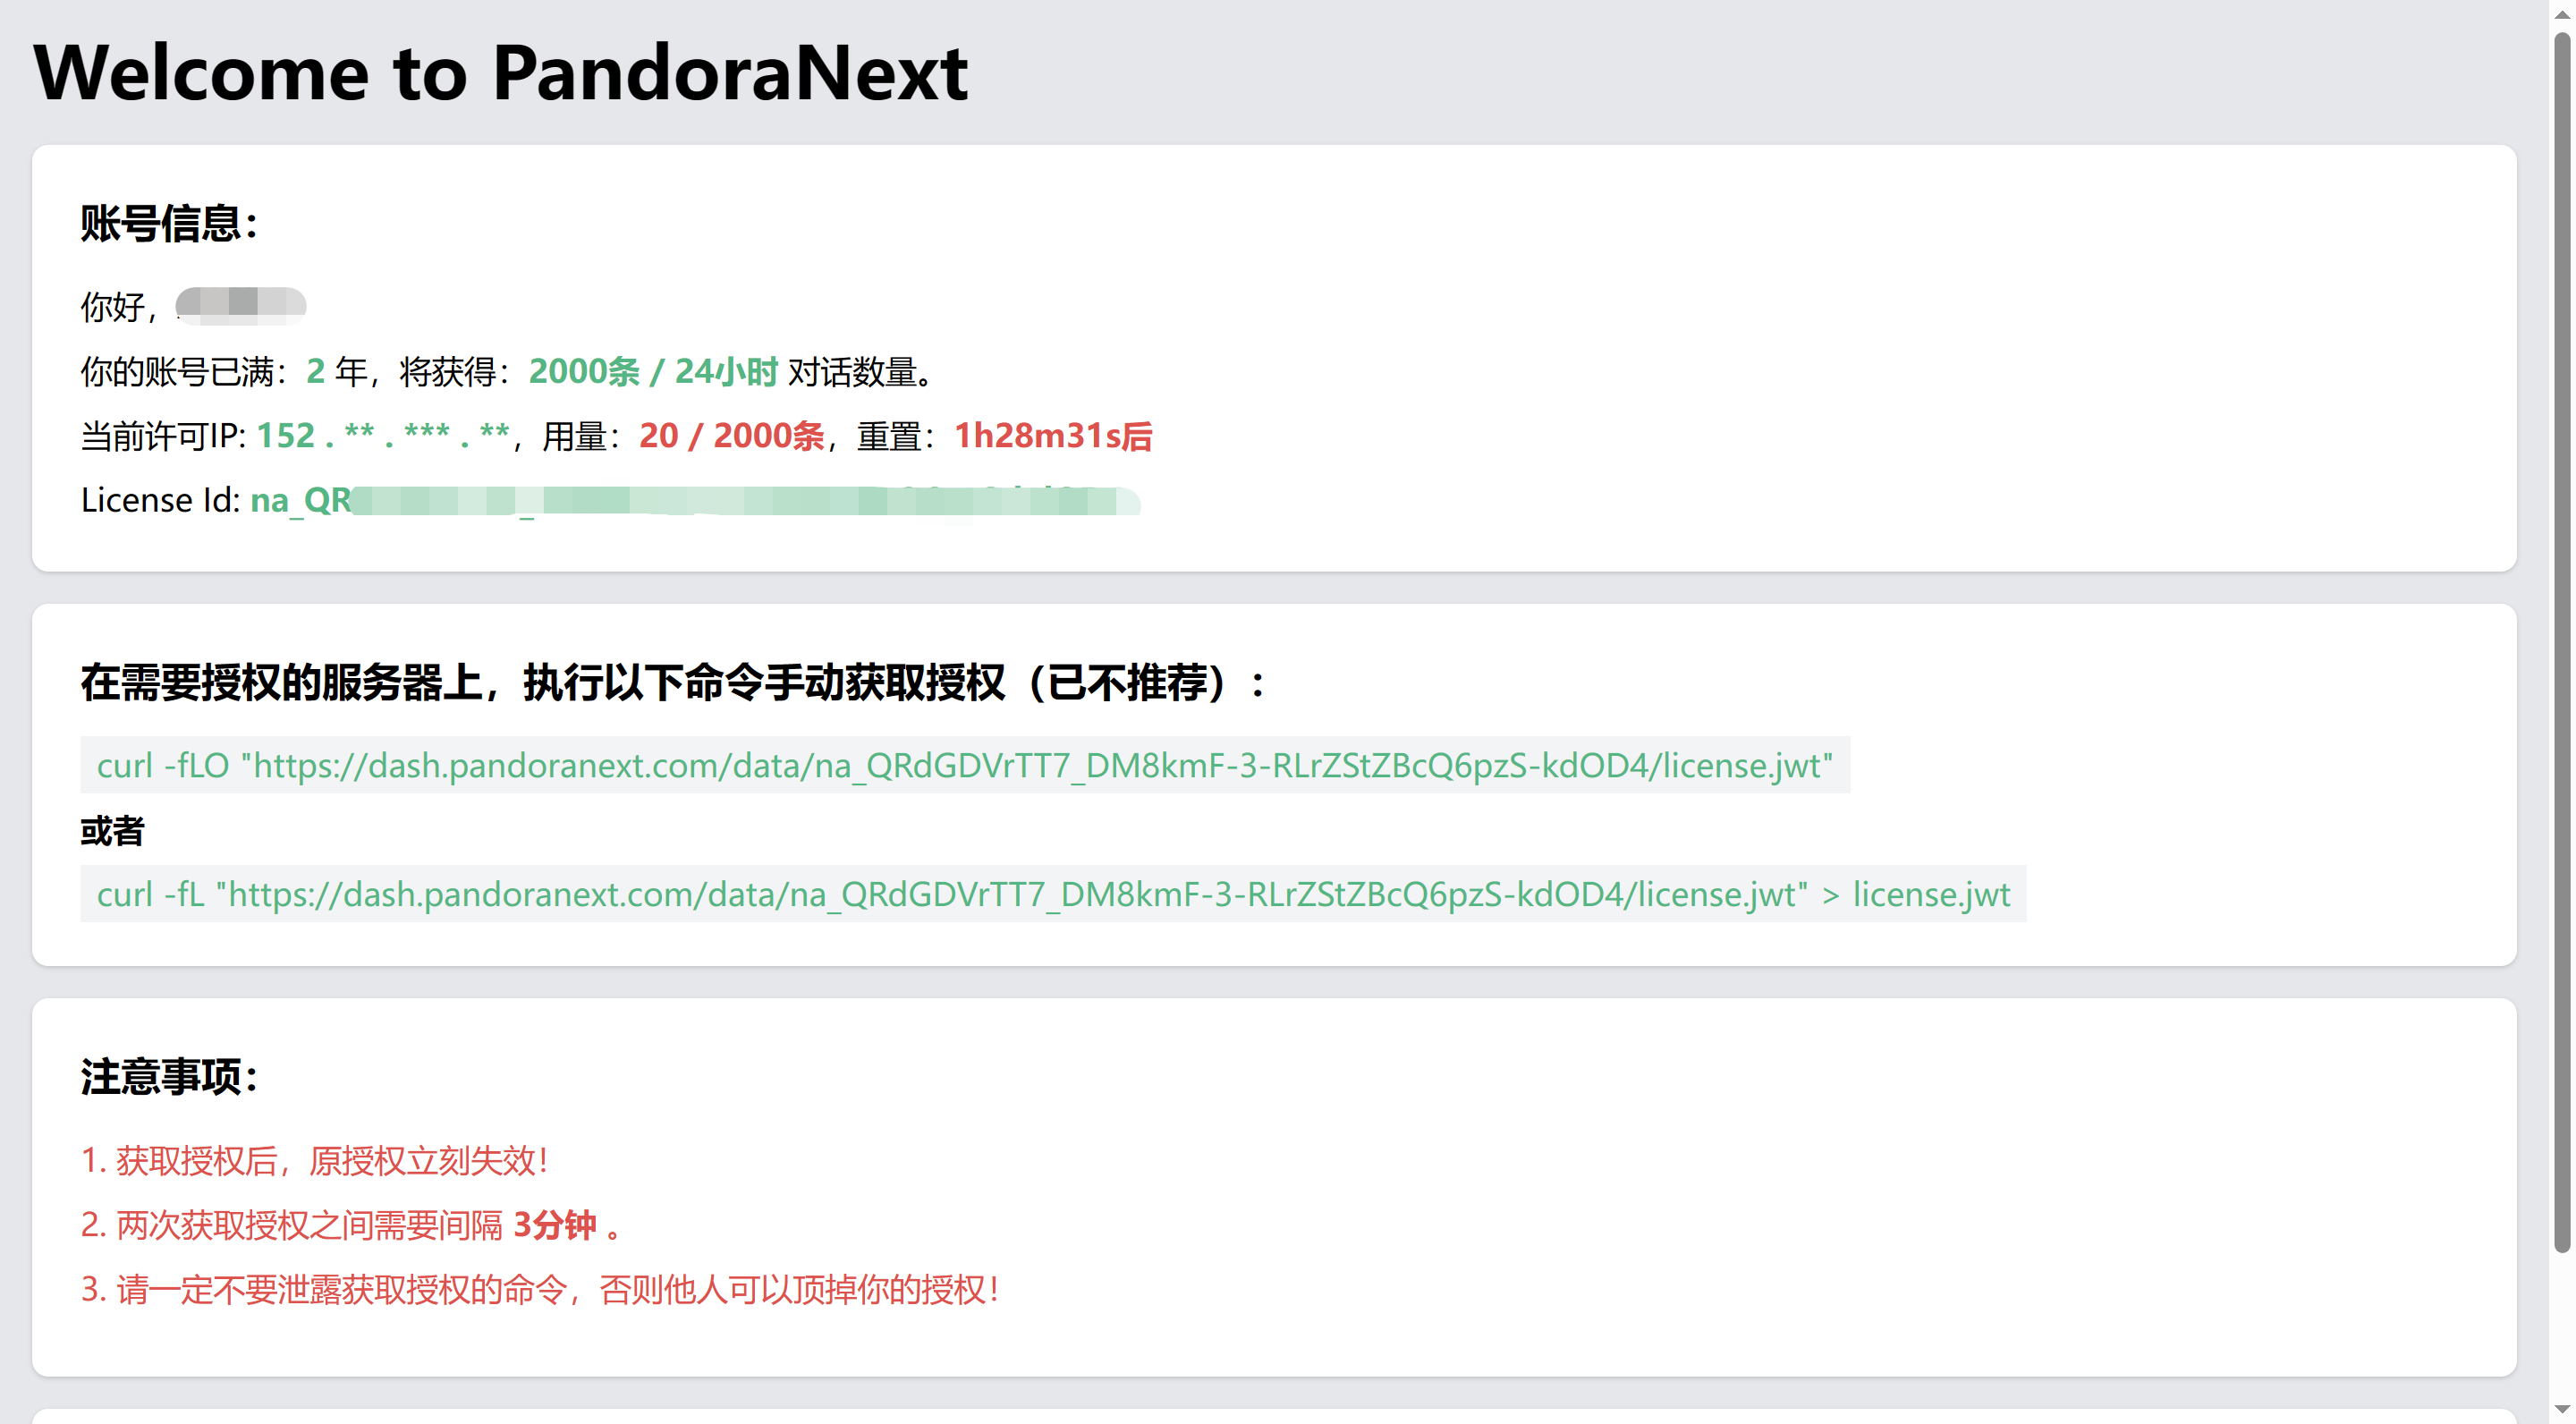
<li>会提示需要Github账号的<code>license_id</code>。以下方式获取：</li>
</ol>
<ul>
<li>
<p>访问：<a href="https://dash.pandoranext.com">Dashboard</a></p>
</li>
<li>
<p>登录Github账号获取<code>license_id</code></p>
</li>
</ul>
<figure data-type="image" tabindex="1"><img src="https://tc.azad.asia//blog/202312271716221.png" alt="image-20231227171614906" loading="lazy"></figure>
<ol start="5">
<li>
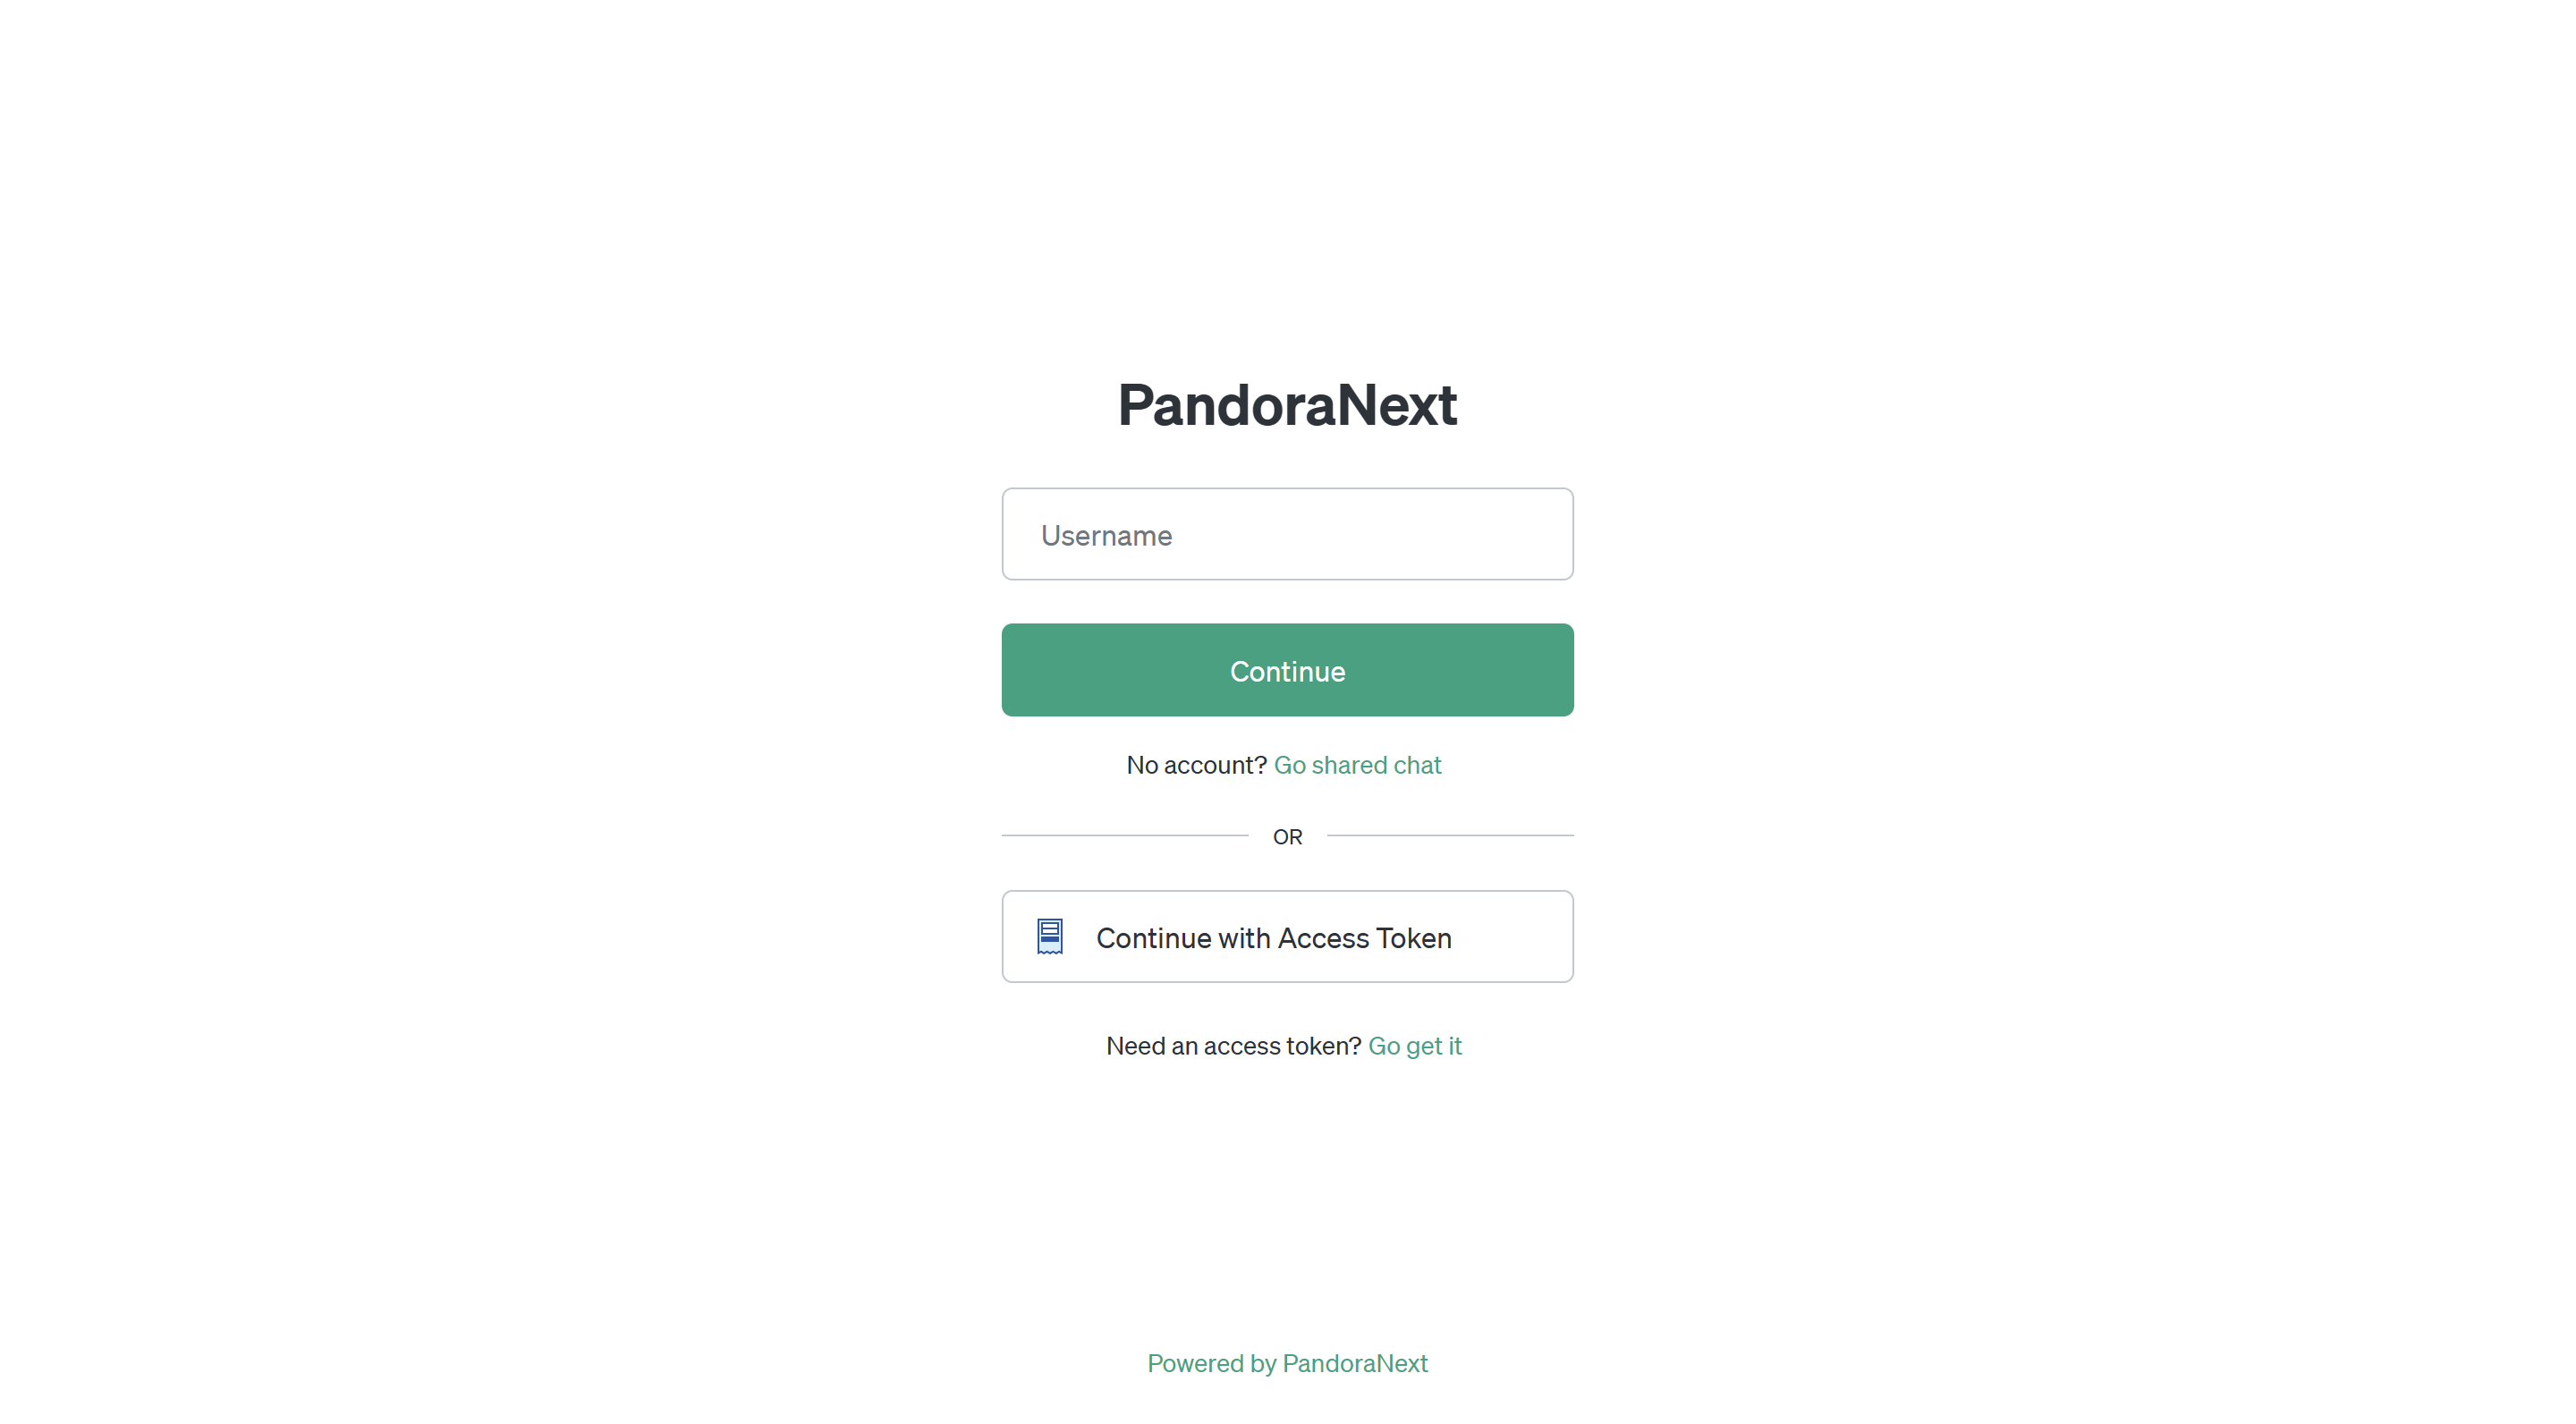
<p>大功告成。访问你的ip地址加8181端口。</p>
<p><strong>http://ip:8181</strong></p>
</li>
</ol>
<figure data-type="image" tabindex="2"><img src="https://tc.azad.asia//blog/202312021108420.png" alt="image-20231202110809281" loading="lazy"></figure>
<h3 id="更新网站">更新网站</h3>
<p>docker-compose down #停止容器<br>
docker-compose pull #拉取最新镜像<br>
docker-compose up -d #启动新容器</p>
]]></content>
    </entry>
</feed>